To install PostgreSQL, perform the following steps:
- Download a 64-bit PostgreSQL installer from http://www.enterprisedb.com/products-services-training/pgdownload#windows Choose the one that says Win X86-64. Autopsy has been tested with PostgreSQL version 9.5.
- Run the installer. The name will be similar to postgresql-9.5.3-1-windows-x64.exe.
- You may accept defaults for all items except for the password as you work through the wizard. Do not lose the password you enter in. This is the PostgreSQL administrator login password.
- You do not need to launch the StackBuilder nor acquire any more software from it. Uncheck the option to use StackBuilder and press Finish.
- Create a regular user account to use while running Autopsy. You can do this with either of two methods, graphically, or command line. We cover graphically first.
- Graphically:
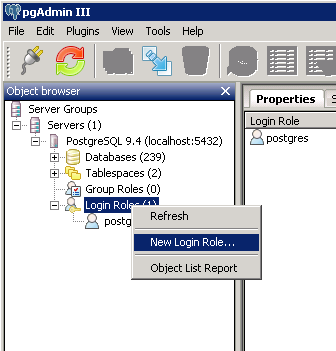
- Using the PostgreSQL administrator login and the pgAdmin III tool, create a regular user account to use while running Autopsy.
- Right click on "Login Roles" and select "New Login Role..." as shown below:
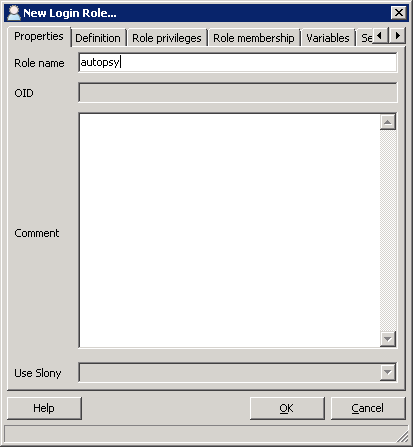
- Enter the user name you would like to use in the "Role name" field.
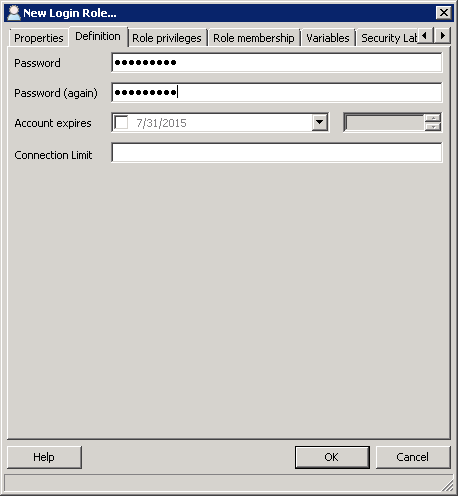
- Enter the password on the "Definition" tab.
- Check "Can create databases" on the "Role Privileges" tab.
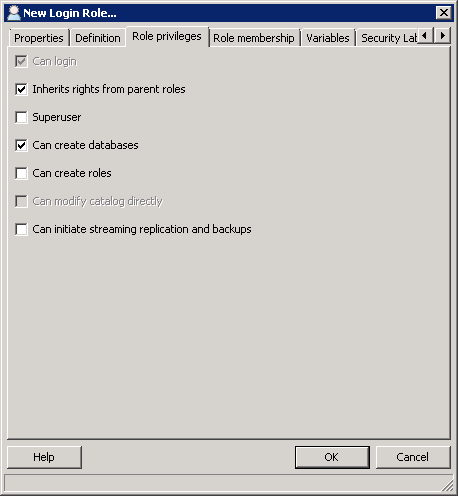
- Click "OK".
- Command line:
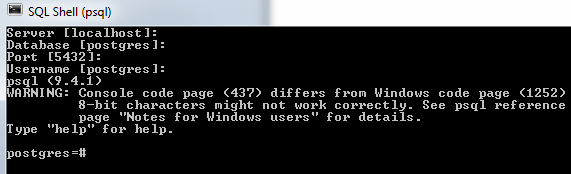
Use the psql tool. To start psql, press Start, type psql, and press Enter a few times until it prompts you for a password. Type in the password you gave it when installing PostgreSQL. You should see a prompt that looks like the screenshot below.
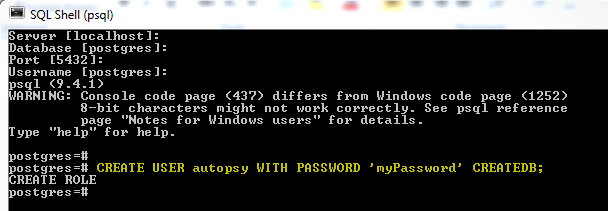
If you want your user account name to be "Autopsy" and your password to be "myPassword", use the following command to create a new user, noting that the password is enclosed in single quotes, not backticks nor double quotes. Also note that it is important to type this command in from the keyboard directly, as copying and pasting can sometimes yield different characters for single quotes that can confuse psql.
The command is:
CREATE USER Autopsy WITH PASSWORD 'myPassword' CREATEDB;
When you see the CREATE ROLE output as shown in the screenshot below, the new user has been created. You can close the psql window now.
- Graphically:
- Edit C:\Program Files\PostgreSQL\9.5\data\pg_hba.conf to add an entry to allow external computers to connect via the network.
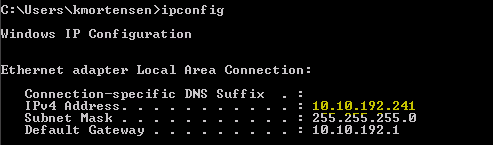
First, find your machine's IPv4 address and Subnet Mask (Press Start, type cmd, type ipconfig and parse the results. The IP address is shown in yellow below.
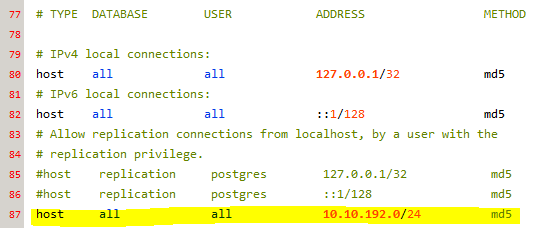
The following is an example rule that allows all clients on the 10.10.192.x subnet to connect using md5 authentication.
host all all 10.10.192.0/24 md5
Subnet Mask Rules of thumb:- If your Subnet Mask is 255.255.0.0, your rule should look like this: A.B.0.0/16, where A is the first octet in your IP address and B is the second octet.
- If your Subnet Mask is 255.255.255.0, your rule should look like this: A.B.C.0/24, where A is the first octet in your IP address, B is the second octet, and C is the third octet.
Add the line highlighted in yellow below, formatted with spaces between the entries, adjusting the IP address to an appropriate value as described above.
If you intend to use PostgreSQL from machines on a different subnet, you need an entry in the pg_hba.conf file for each subnet.
- If your Subnet Mask is 255.255.0.0, your rule should look like this: A.B.0.0/16, where A is the first octet in your IP address and B is the second octet.
- Uncomment the following entires in the configuration file located at C:\Program Files\PostgreSQL\9.5\data\postgresql.conf by removing the leading "#", and change their values "off" as shown below.
fsync = off
synchronous_commit = off
full_page_writes = off
Pictorially, change the following, from this:
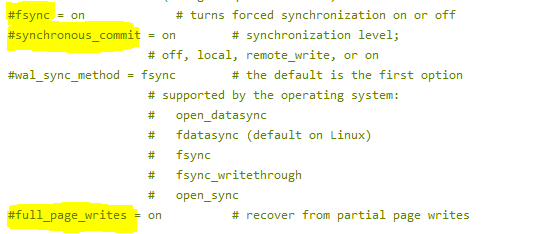
To this:

Note the removal of the leading number symbol-this uncomments that entry.
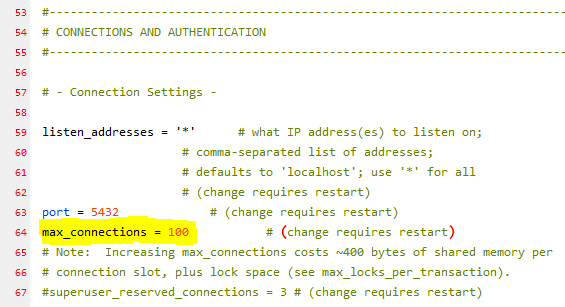
- Still in "C:\Program Files\PostgreSQL\9.5\data\postgresql.conf", find the entry named max_connections and set it to the number of suggested connections for your configuration. A rule of thumb is add 100 connections for each Automated Ingest Node and 100 connections for each Reviewer node you plan to have in the network. More information is available at 5.1.1. See the screenshot below.
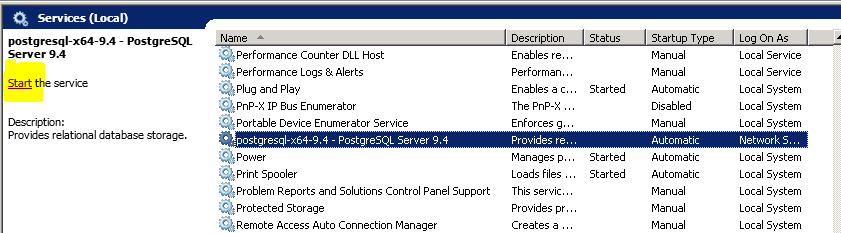
- Press Start, type services.msc, and press Enter. Select postgresql-x64-9.5 in the services list and click the link that says Stop the service then click the link that says Start the service as shown in the screenshot below.
PostgreSQL should now be up and running. You can verify by using either the pgAdmin tool or the psql tool to connect to the database server from another machine on the network .