Table of Contents
Overview
The Live Triage feature allows you to load Autopsy onto a removable drive to run on target systems while making minimal changes to that target system. This will currently only work on Windows systems.
Creating a live triage drive
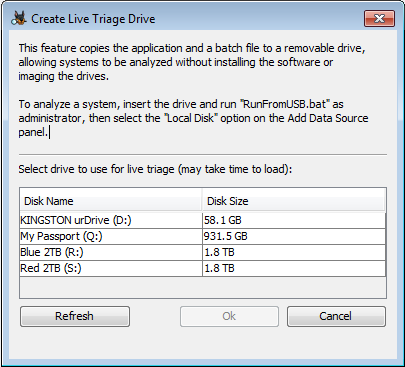
To create a live triage drive, go to Tools->Make Live Triage Drive to bring up the main dialog.

Select the drive you want to use - any type of USB storage device will work. For best results use the fastest drive available. Once the process is complete the root folder will contain an Autopsy folder and a RunFromUSB.bat file.
Running Autopsy from the live triage drive
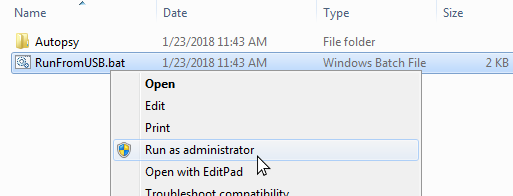
Insert the drive into the target machine and browse to it in Windows Explorer. Right click on RunFromUSB.bat and select "Run as administrator". This is necessary to analyze the local drives.

Running the script will generate a few more directories on the USB drive. The configData directory stores all the data used by Autopsy - primarily configuration files and temporary files. You can make changes to the Autopsy settings and they will persist between runs. The cases directory is created as a recommended place to save your case data. You will need to browse to it when creating a case in Autopsy.
Once Autopsy is running, proceed to create a case as normal, making sure to save it on the USB drive.

Then choose the Local Disk data source and select the desired drive.

See the Adding a Local Disk page for more information on local disk data sources.
Using hash sets
Follow these steps to import a hash set to use with the Hash Lookup Module :
- Run Autopsy from the live triage drive, as described earlier
- Go to Tools->Options and then the "Hash Set" tab
-
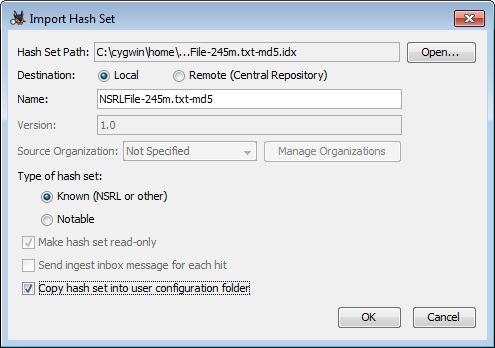
Import the hash set as normal (using a "Local" destination) but check the "Copy hash set into user configuration folder" option at the bottom

This will allow the hash set to be used regardless of the drive letter assigned to the live triage drive.