Table of Contents
Overview
You can configure Autopsy through the main options panel. This is accessed by going to Tools->Options. Here you can change how cases are displayed, configure how Autopsy runs, and create hash sets, keyword lists, etc.
The options panel has different tabs for each feature. These options are documented on the main pages for each feature. For example, the keyword search options panel is described on the main Keyword Search Module page. The tabs that do not go with a feature documented elsewhere will be described here.
Application Options
The first tab on the options panel is for general application settings.
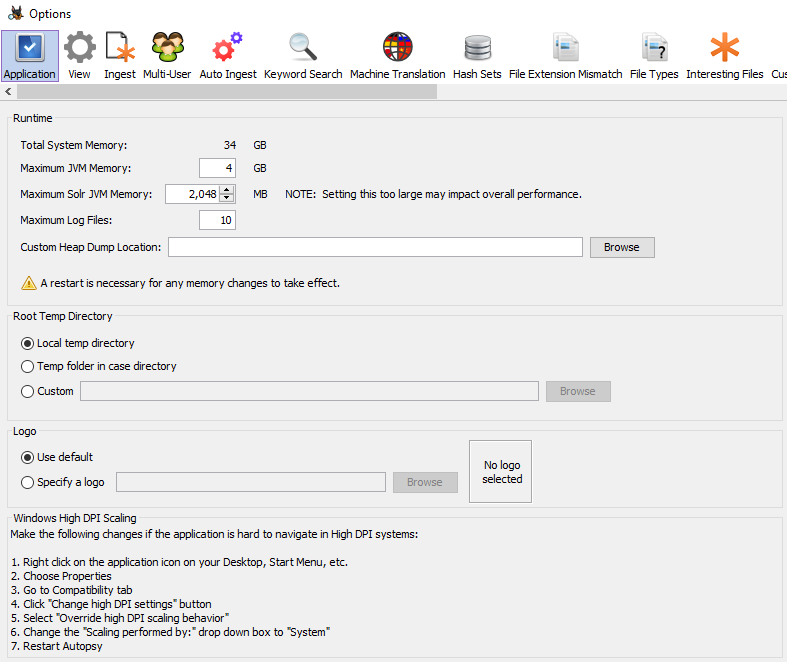
The top section lets you adjust how much memory is used by Autopsy and how many log files to keep. Generally each Autopsy session generates one log file, though it can generate more if the log file becomes too large. You can also specify a custom location to write heap dumps to.
The next section lets you specify where Autopsy should store temporary files. These files will be deleted when a case is closed. There are three options:
- Local temp directory - Uses the system temp folder (On Windows, typically C:\Users\(user name)\AppData\Local\Temp\Autopsy)
- Temp folder in case directory - Puts temporariy files in the "temp" directory in the case folder
- Custom - Will use the given folder as a base for the temporary files
The next section lets you set a custom logo.
This logo will be displayed in any generated HTML reports.
The final section lists instructions on how to change scaling for high DPI Windows systems.
View Options
See the View Options page for a description of how you can customize what data is displayed in Autopsy.
External Viewers
The External Viewers tab allows you to add file associations and select a hex editor.
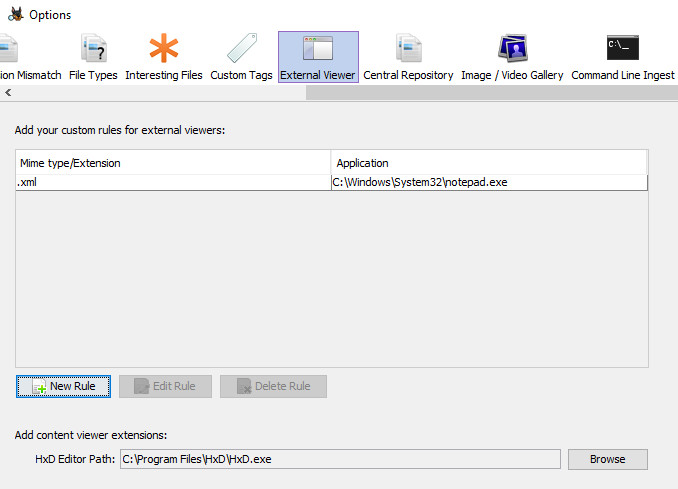
The top section allows you to enter custom file associations by either extension or MIME type. In the image above we've associated .xml files with the Notepad application. Now it is possible to right click on a .xml file in the results viewer and choose "Open in external viewer" to open that .xml file in Notepad.

The bottom section allows you to specify a hex editor. HxD has been tested and is the default, but other hex editors will work as well. The selected hex editor will be launched when clicking the "Launch in HxD" button in the "Hex" tab of the Content Viewer.
General Options
The general options tab allows you to configure proxy settings.
