Table of Contents
Tagging (or Bookmarking) allows you to create a reference to a file or object and easily find it later or include it in a report. Tagging is also used by the central repository to mark items as notable. You can add comments to files and results using tags or through the central repository.
Tagging items
When an interesting item is discovered, the user can tag it by right-clicking the item and selecting one of the tag options.
When you tag a Blackboard artifact result, you have the choice to either:
- Tag File – use this when the file itself is of interest
- Tag Result – use this when the result is of interest
Which to choose depends upon the context and what you desire in the final report.
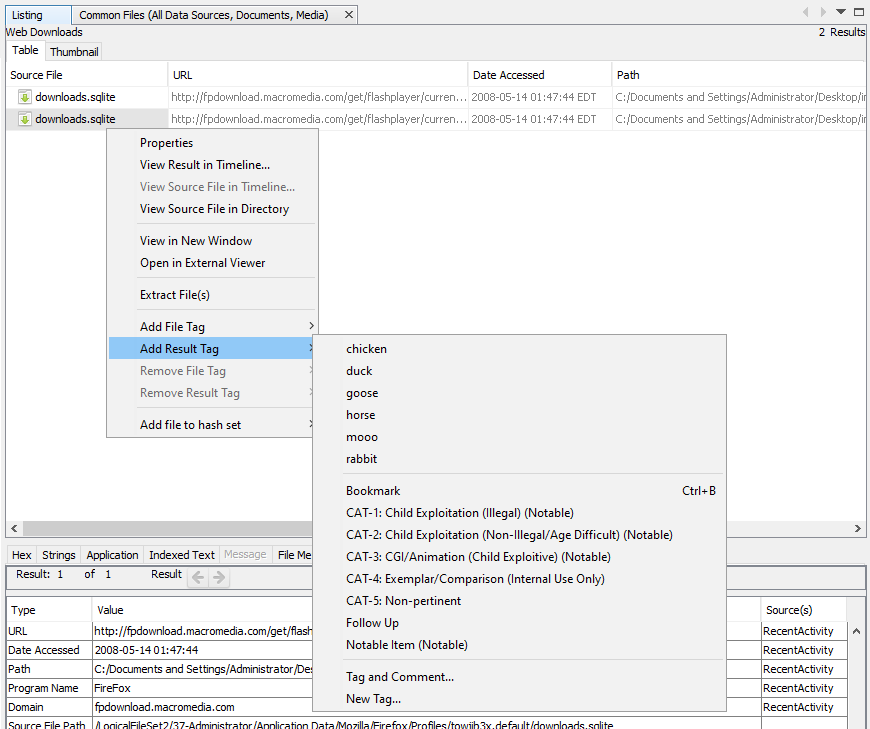
At this point there are three options:
- Use one of the existing tags to add it to the file/result without a comment
- Tag and Comment – use this if you need to add a comment about this tag
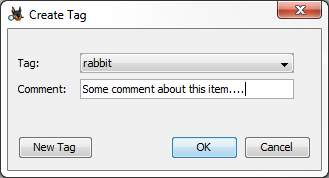
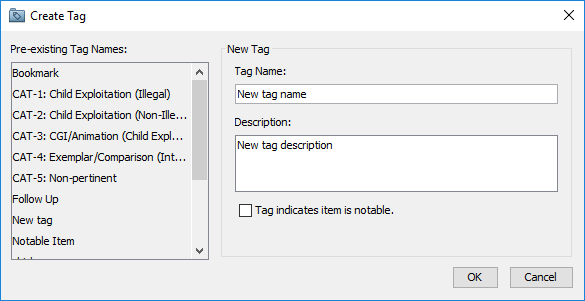
- New tag – Create a new tag and add it to the file/result
There are several default tag names:
- Bookmark - Default tag for marking files of interest
- CAT-1 through CAT-5 - For law enforcement use
- Follow Up - Default tag for marking files to follow up on
- Notable item - Default tag for indicating that an item should be marked as notable in the central repository
You can also create custom tag names. These tag names will be automatically saved for future use and will be displayed above the default tag names.
If you just want to tag the item with the default "Bookmark" tag, you can also use the keyboard shortcut control+B instead of going through the menus.
You can also apply tags to groups of items at once. Select multiple items in the Blackboard, right click, and add the appropriate tag. Items may have more than one tag.
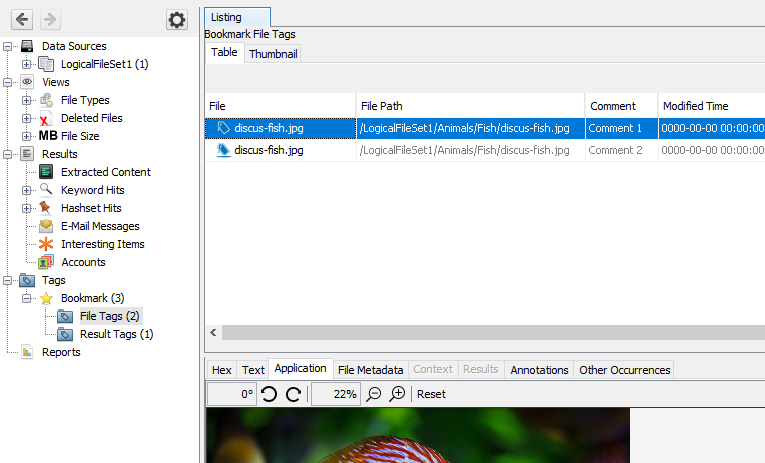
Tagged results are shown in the "Results" portion of the tree under "Tags". Tagged items are also highlighted in the Results Viewer.
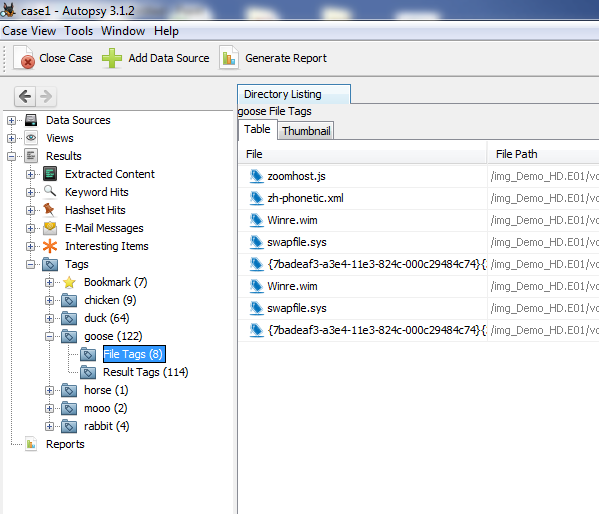
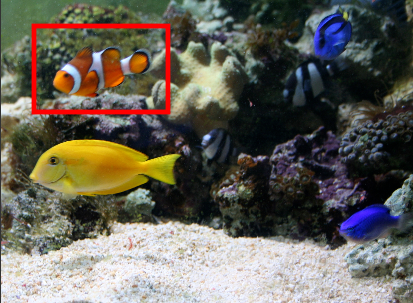
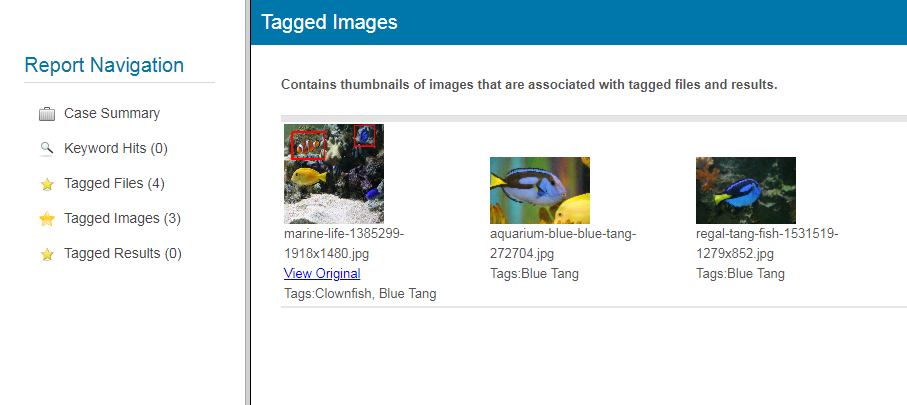
Image tagging
When you have an image selected in the Result Viewer, you'll see a "Tags Menu" option in the upper right of the "Application" Content Viewer. This allows you to tag only a selected area of the image. Image tagging is currently only enabled on Windows.

Creating an image tag
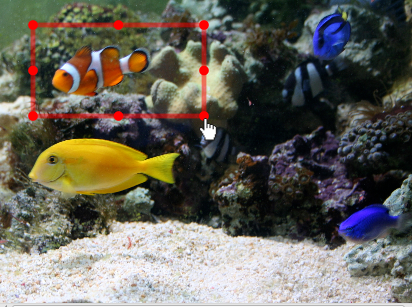
To start, select the "Create" option on the tags menu. You may then left-click and drag on the image to create a rectangle (which will be your 'tag'). When you release the mouse, you'll be able to apply a tag name (and optionally a comment) to your image tag.
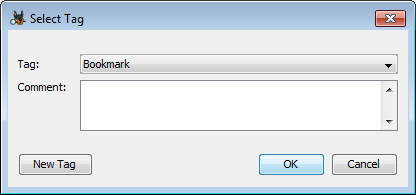
You can add a new tag name using the "New Tag" button.

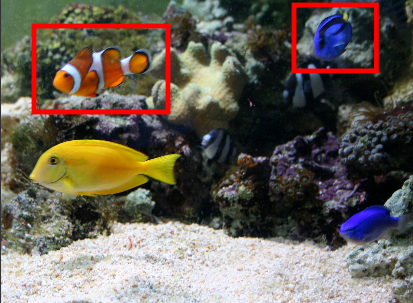
Once you choose the tag name you'll see a red outline in the image around the section you chose.
You can create multiple tags in the same image.
If you want to temporarily hide the tag outlines, select "Hide" from the tags menu. You can then select "Show" to see them again. The outlines will also reappear if you switch to a different item in the Result Viewer and come back.
Selecting, resizing and deleting an image tag
In order to resize or delete an image tag, you will need to first select it. You can do this by left clicking anywhere inside (or on) the image tag. Selected tags can be resized by dragging any of the 8 handles that appear. The resized dimensions will automatically be saved when the mouse is released.
Selecting a tag will also enable the "Delete" option in the tags menu. Deleting a tag is an irreversible operation, so please use caution.
Exporting and reporting on image tags
If you want to save the image with the tag outline, select "Export" from the tags menu. The result will always be a PNG file. Note that using the "Extract File(s)" option from the right-click menu in the Result Viewer will export the original image.
You'll also be able to see the image tags in an HTML report.
Managing tags
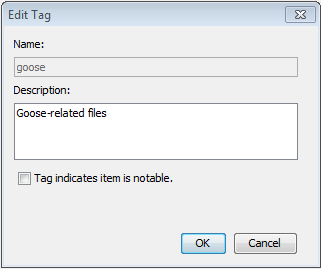
The list of tags can be edited through the Tags tab on the Options menu.
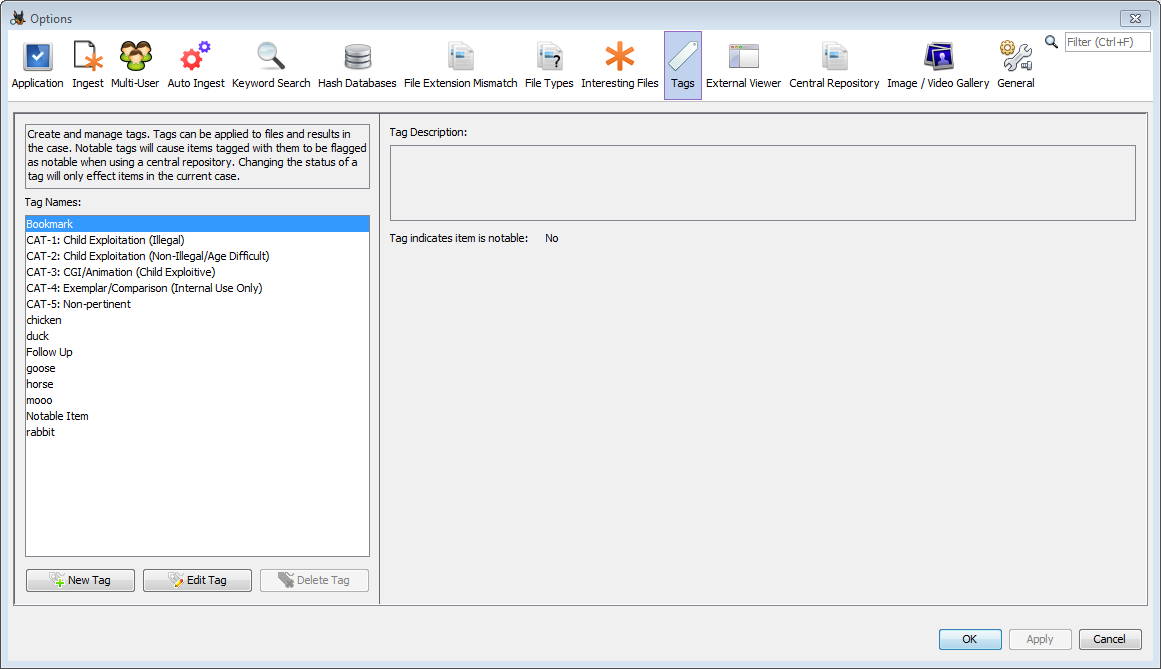
From here, new tags can be added, existing tags can be edited, and user-created tags can be deleted. Note that deleting a tag does not remove it from any tagged items, and that tag will still be usable in any case where it has been used to tag an item.
If using the central repository, changing the notable status will effect tagged items in the current case only in the following way:
- If "File A" is tagged with "Tag A", which is not notable, and then "Tag A" is switched to notable, "File A" will be marked as notable in the central repository
- If "File B" is tagged with "Tag B", which is notable, and then "Tag B" is switched to non-notable, if there are no other notable tags on "File B" then its notable status in the central repository will be removed.
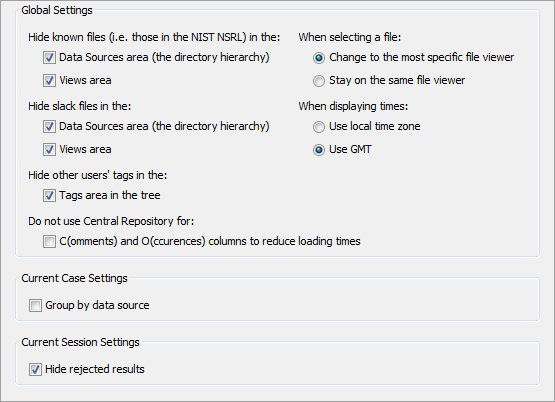
Hiding tags from other users
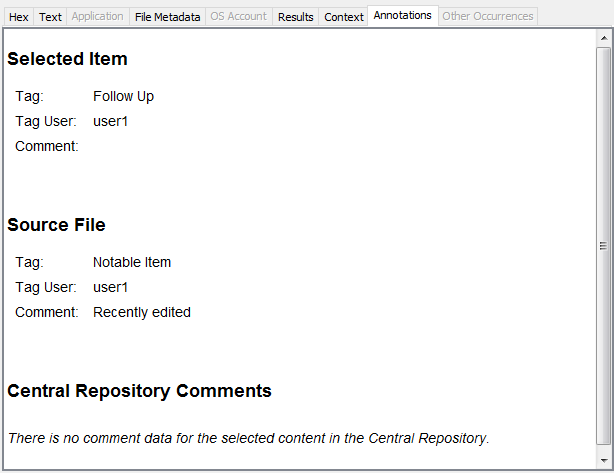
Tags are associated with the account name of the user that tagged them. This information is visible through selecting items under the "Tags" section of the directory tree:

or through the Annotations content viewer:
It is possible to hide all tagged files and results in the "Tags" area of the tree that were tagged by other users. Open the View Options menu either through the gear icon above the directory tree or through Tools->Options, and then select the checkbox to hide other users' tags in the tags area of the tree.
Commenting
There are two methods to adding comments to files and results. The first method was discussed in the Tagging items section. Right click on the file or result of interest, choose "Add File Tag" or "Add Result Tag" and then "Tag and Comment". This allows you to add a comment about the item. You can add multiple tags with comments to the same file or result.
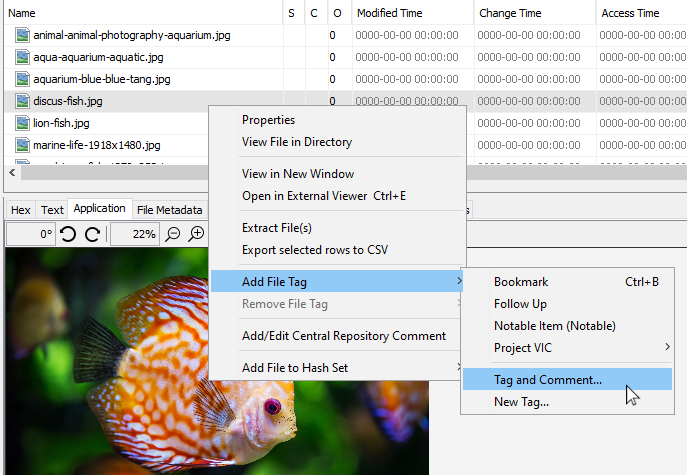
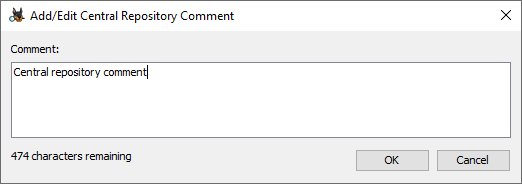
If you have a central repository enabled, you can also use it to save comments about files. Right click on the file and select "Add/Edit Central Repository Comment". If there was already a comment for this file it will appear in the dialog and can be changed - only one central repository comment can be stored at a time.
If a file or result has a comment associated with it, you'll see a notepad icon in the "C" column of the result viewer. Hovering over it will tell you what type of comments are on the item.
You can view comments associated with tags by going to the "Tags" section of the tree viewer and selecting one of your tags. Any comments will appear in the "Comment" column in the results viewer.
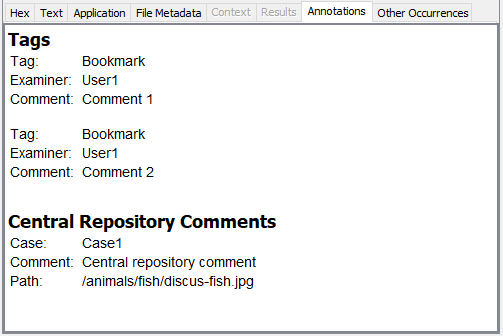
You can view all comments on an item through the "Annotation" tab in the content viewer.
Copyright © 2012-2024 Sleuth Kit Labs. Generated on
This work is licensed under a
Creative Commons Attribution-Share Alike 3.0 United States License.