To install ActiveMQ, perform the following steps:
Prerequisites
You will need:
- 64-bit version of the Java Runtime Environment (JRE) from http://www.oracle.com/technetwork/java/javase/downloads/jre8-downloads-2133155.html.
- Download ActiveMQ from: http://activemq.apache.org/download.html . Autopsy has been tested with ActiveMQ version 5.14.0.
Installation
JRE Installation
Install the Java JRE if needed. You can test this by running where java from the command line. If you see output like the yellow results below, you have a JRE.

If you need the JRE, install it with the default settings.
ActiveMQ Installation
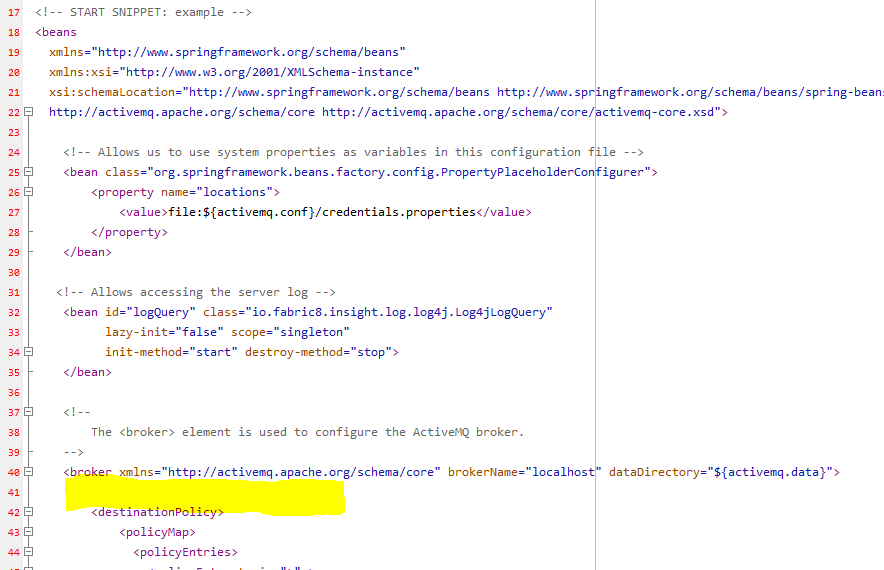
- Extract the contents of the ActiveMQ archive folder to a location of your choice, bearing in mind that the files should be in a location that the running process will have write permissions to the folder. A typical folder choice would be similar to C:\Program Files\apache-activemq-5.13.3. Typically, it will ask for administrator permission to move the folder. Allow it if required.
- Edit the conf\activemq.xml in the extracted folder to add "&wireFormat.maxInactivityDuration=0" to the URI for the transportConnector named openwire. Add the text highlighted in yellow below:

- Install ActiveMQ as a service by navigating to the folder bin\win64, right-clicking InstallService.bat, clicking Run as administrator, then click Yes.
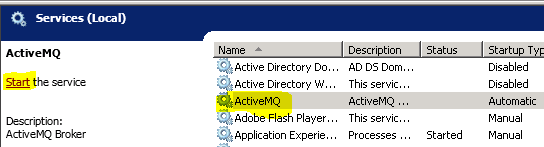
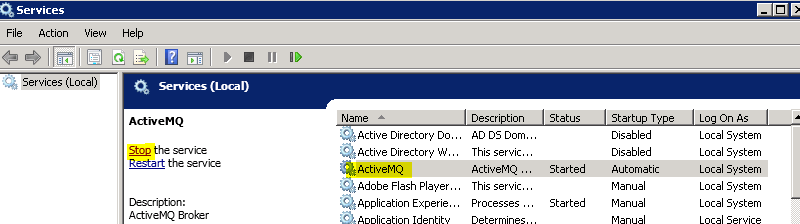
- Start the ActiveMQ service by pressing Start, type services.msc, and press Enter. Find ActiveMQ in the list and press the Start the service link.
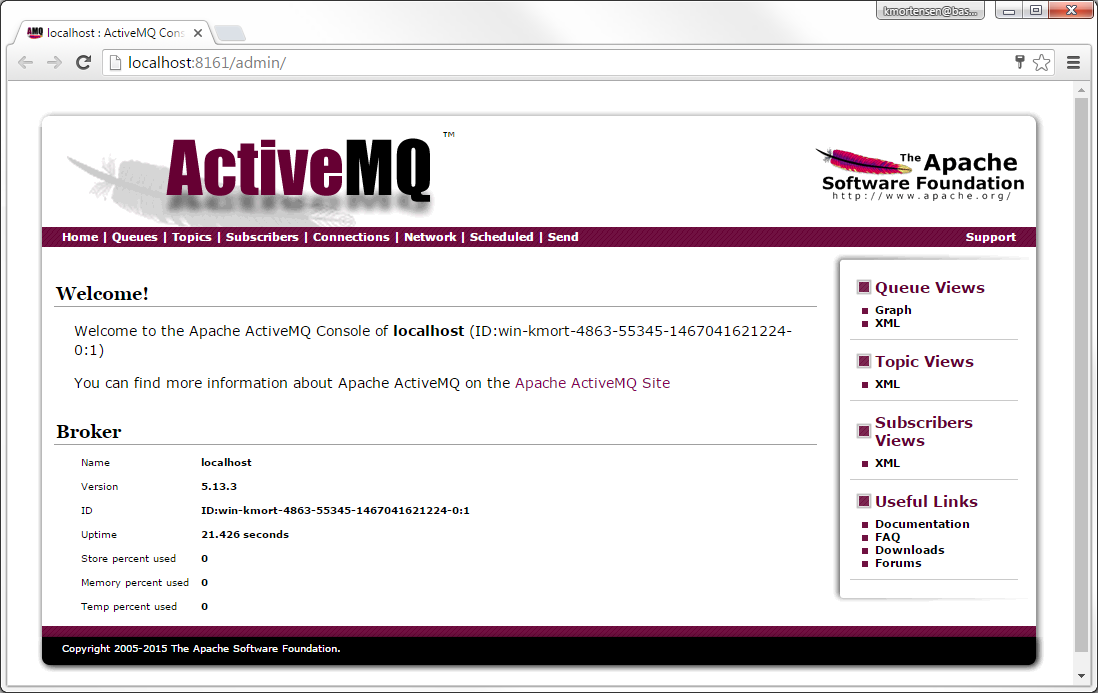
- ActiveMQ should now be installed and configured using the default credentials. You should go to the next section to change the default passwords. To test your installation, you can access the admin pages in your web browser via a URL like this (set your host): http://localhost:8161/admin. The default administrator username is admin with a password of admin and the default regular username is user with a default password of password. You can change these passwords by following the instructions below. If you can see a page that looks like the following, it is ready to function.
If you do not see a screen like the above screenshot and you have double checked that the ActiveMQ service is running, contact your network administrator. For the ActiveMQ service to be accessible by network clients you may need to configure your Windows firewall (and any other 3rd party firewall in use) to allow communication.
Configuring Authentication
You can optionally add authentication to your ActiveMQ server. The ActiveMQ communications are not encrypted and contain basic messages between the systems about when new data has been found.
The following directions allow you to set up credentials:
- Copy and paste the following text to the file "conf\groups.properties", overwriting the text highlighted in yellow in the screenshot below:
admins=system,sslclient,client,broker1,broker2
tempDestinationAdmins=system,user,sslclient,client,broker1,broker2
users=system,user,sslclient,client,broker1,broker2
guests=guest
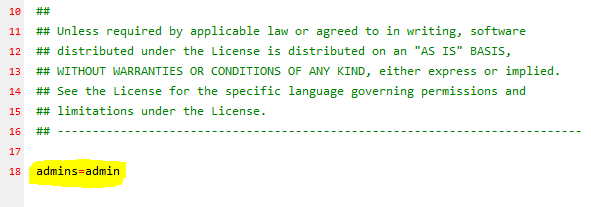
When complete, the file should look like this:
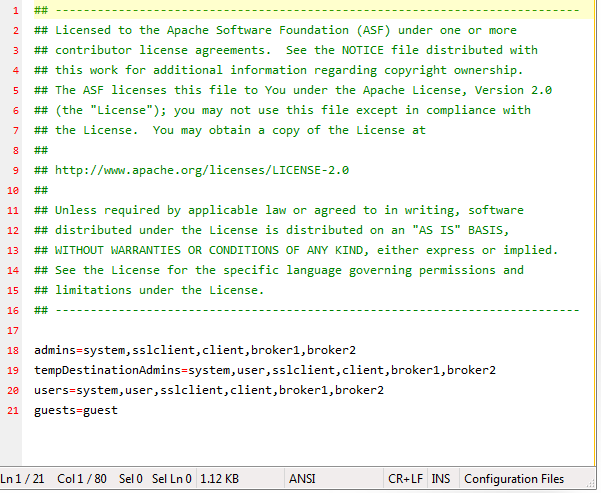
- Copy and paste the following text to the file "conf\users.properties", overwriting the text highlighted in yellow in the screenshot below:
system=manager
user=password
guest=password
sslclient=CN=localhost, OU=activemq.org, O=activemq.org, L=LA, ST=CA, C=US
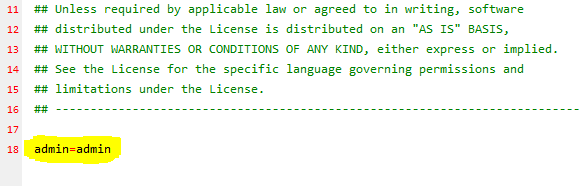
When complete, the file should look like this:

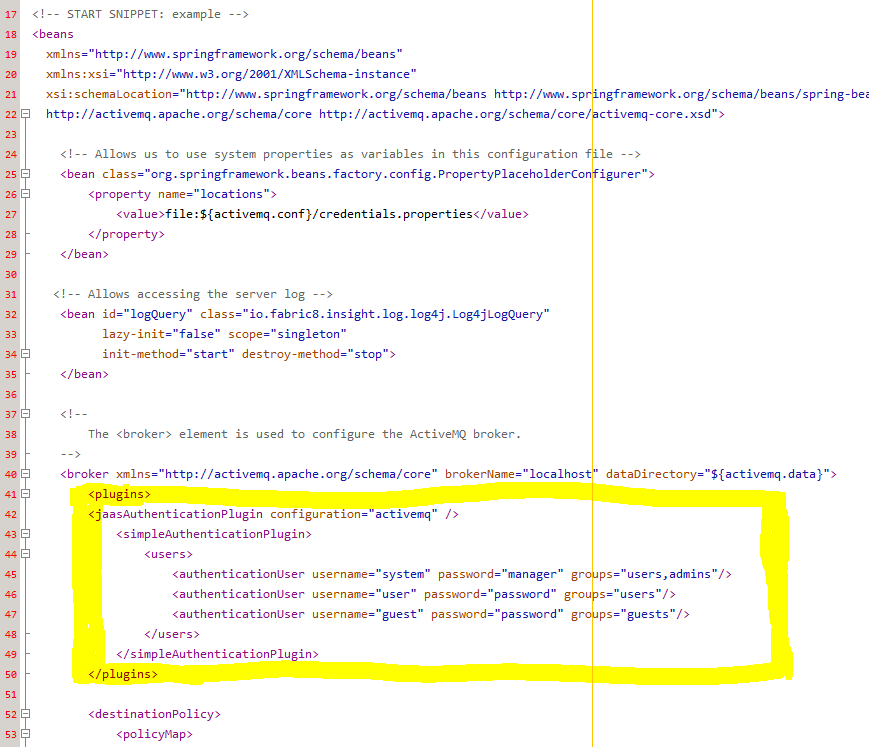
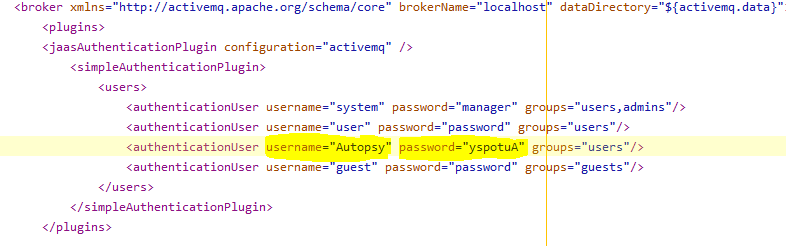
- Copy and paste the following text to the file "conf\activemq.xml", inserting the text at the line shown in yellow in the screenshot below.
     <plugins>
     <jaasAuthenticationPlugin configuration="activemq-domain" />
         <simpleAuthenticationPlugin>
             <users>
                 <authenticationUser username="system" password="manager" groups="users,admins"/>
                 <authenticationUser username="user" password="password" groups="users"/>
                 <authenticationUser username="guest" password="password" groups="guests"/>
             </users>
         </simpleAuthenticationPlugin>
     </plugins>
After insertion, the file should look like the screenshot below, with the inserted portion highlighted in yellow. This is where you can change the username and password for your ActiveMQ setup.
To add a new user or change the password:
- Stop the ActiveMQ service by pressing Start, type services.msc, and press Enter. Find ActiveMQ in the list and press the Stop the service link.
- Edit "conf\activemq.xml" adding the desired line. Both username and password are case sensitive. You will very likely want to keep your new users in the users group.
- Start the ActiveMQ service by pressing Start, type services.msc, and press Enter. Find ActiveMQ in the list and press the Start the service link.