Table of Contents
Claude Overview
The MCP feature of Autopsy allows you to connect a GenAI MCP Client to Autopsy and query its data. Claude Desktop is often used for this, but other MCP Clients can be as well.
Autopsy provides "MCP over STDIO". It is NOT over HTTP.
More information about MCP can be found here: https://www.cybertriage.com/ai/intro-to-mcp-servers-for-dfir-and-soc-investigations-using-ai/
You are responsible for knowing where your MCP client sends data and what the retention and sharing policies are of that server. For example, a default Claude Desktop installation will send data to Anthropic servers and their access to your data will depend on your settings.
MCP and Autopsy Basics
If enabled, your MCP Client (such as Claude) has read-only access to your Autopsy data. It can't issue any commands to update or change your data set. We may change this in the future to allow it to add, but not remove, a score or label. You need to run Autopsy on the same system that Claude Desktop is running on. You need to open the Case in Autopsy first and then Claude can access that data.
Install MCP Client - Claude Desktop
The following are the steps for Claude Desktop. Download Claude Desktop : https://support.claude.com/en/articles/10065433-install-claude-desktop Setup an account at https://claude.ai or configure your cloud provider, such as AWS Bedrook, to obtain access to an Anthropic model. You can use a private instance of Claude (or whatever model you use that is compatible with your MCP client). Launch Claude Desktop and login to your account
Enable the MCP Server
Launch Autopsy, go to the Options panel, and navigate to the "AI: MCP Server" panel (far right).
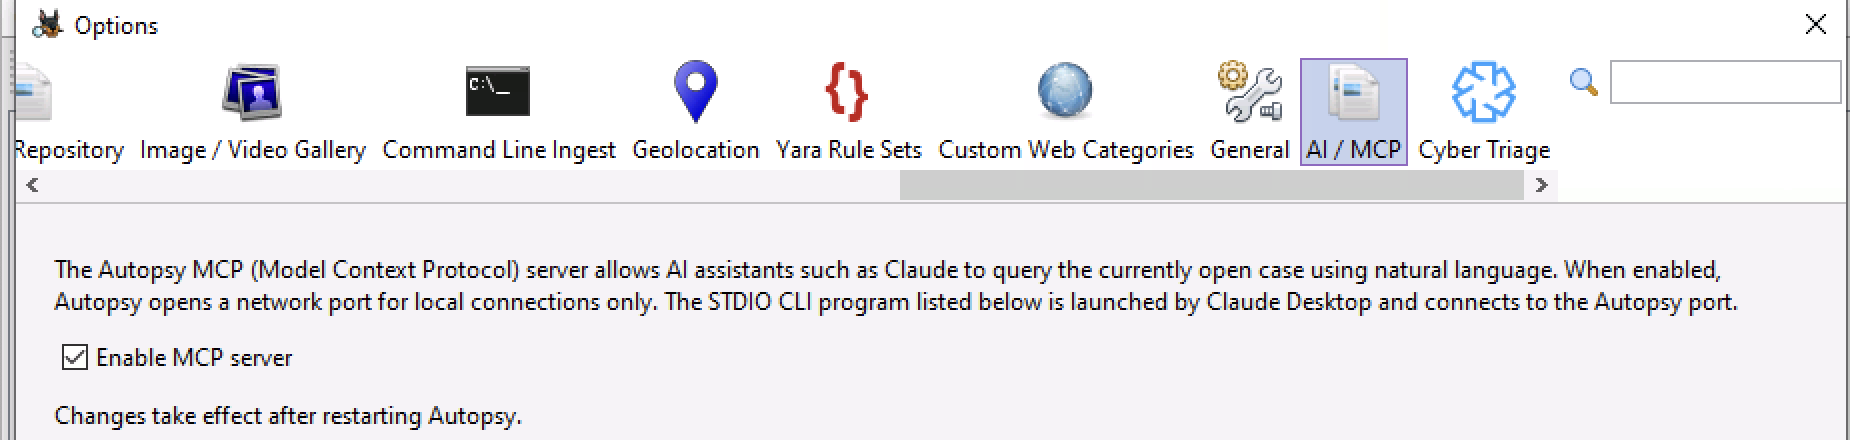
Check to enable the feature.
Copy the file path that you see. It should be something like:
C:\\Program Files\\Autopsy-XXX\\bin\\autopsy-mcp-stdio.exe
You will need to preseve the double slashes.
Autopsy will need to restart for the MCP server to be enabled.
Configure Claude Desktop
Next, find your claude_desktop_config.json file. These apps change quickly, but this is currently where to find it:
C:\Users\JDOE\AppData\Local\Packages\Claude_pzs8sxrjxfjjc\LocalCache\Roaming\Claude\claude_desktop_config.json
If not, then search your system for where that file is or see if Anthropic moved the data.
When you open that file in a text editor, you'll see something like this if it is a new installation:
{
  "preferences": {
    "coworkScheduledTasksEnabled": false,
    "ccdScheduledTasksEnabled": true,
    "sidebarMode": "chat",
    "coworkWebSearchEnabled": false
  }
}
You need to:
Add a comma after the second to last } Add an mcpServer section like the one below before the final }
It should look like this:
{
  "preferences": {
    "coworkScheduledTasksEnabled": false,
    "ccdScheduledTasksEnabled": true,
    "sidebarMode": "chat",
    "coworkWebSearchEnabled": false
  },
  "mcpServers": {
    "autopsy": {
      "command": "c:\\Program Files\\autopsy-XXX\\bin\\autopsy-mcp-stdio.exe"
    }
  }
}
Obviously make sure you use the same path that you copied out of the app. The double back slashes are required.
Don't forget to add the comma before you add the "mcpServer". Thats the common mistake.
If you have both Cyber Triage and Autopsy, the section would look like this:
  "mcpServers": {
    "autopsy": {
      "command": "c:\\Program Files\\autopsy-XXX\\bin\\autopsy-mcp-stdio.exe"
    },
    "cybertriage": {
      "command": "c:\\Program Files\\Cyber Triage\\bin\\cybertriage-mcp-stdio.exe"
    }
  }
After you edit the configuration file, shut down Claude Desktop ENTIRELY.
NOTE 1: On Windows, Claude Desktop is still running even after you close the window. You need to go to your task bar and kill it from there before it fully shuts down and reloads the configuration file!
NOTE 2: Because the version number is in the Autopsy path, you will need to update the above path for each upgrade.
NOTE 3: Be VERY careful if you do in fact have both Cyber Triage and Autopy as MCP servers and they are both open at the same time. If you are not specific in each prompt about which tool to use, then it may jump between data sets!
Using Claude Desktop To Analyze Data
After you restat Claude Desktop, you should be ready to go.
First, ask Claude "Can you see the Autopsy MCP server?". It should tell you if it can and what kinds of "tools" it supports. If that doesn't work, refer to the Debugging section below.
Next, open a Case. You can now ask it "is there an autopsy case open?".
Make sure your prompts are specific about if they should be for a single host or all of them in the case.
For example: "make a timeline of all USB Devices" vs "make a timeline of USB Devices from host X".
Other things to note:
- Claude will prompt you to use each tool. This is a security feature. There doesn't seem to be anything we can do about it. Other clients may not prompt you so much.
- Results cannot be more than 1MB. So if you give a very broad request, you may hit that limit. Please let us know if this happens so that we can know what kinds of questions should be more optimized.
Debugging
If Claude Desktop can't see the MCP server, then:
Verify you enabled the server and restarted Autopsy Verify you REALLY stopped Claude Desktop fully by going to the Windows task bar and stopping it there (closing windows is not enough)
If the above are all confirmed, open a command prompt and go to the folder that you copied into the configuration file (such as c:\\Program Files\\Autopsy-XXX\\bin). Type in:
> autopsy-mcp-stdio --test
That will attempt to connect to the server.
If it passes, then the server is running and the autopsy-mcp-stdio can connect. Therefore, the problem is with your Claude Desktop setup. Double check the configuration file and if your account can access MCP servers.
If autopsy-mcp-stdio can't connect, then the problem is the server. Check the logs in your \\AppData\\Local\\Autopsy\\MCP folder for any errors. Also see if a firewall could have blocked the connection.
Architecture
To help with debugging and understanding how this all works, here is a quick run down:
If enabled, at startup, Autopsy opens TCP port 8743 for localhost connections only. It also generates a random token for each launch. All connections from other hosts or without the token are rejected. The autopsy-mcp-stdio.exe program can connect to the port. Claude Desktop communicates with it over STDIO and it acts as a transport between Claude Desktop and the running Autopsy application.
Copyright © 2012-2026 Sleuth Kit Labs. Generated on
This work is licensed under a
Creative Commons Attribution-Share Alike 3.0 United States License.