Overview
The logical imager allows you to collect files from a live Windows computer. The imager is configured with rules that specify what files to collect. Rules can be based on file attributes such as folder names, extensions, and sizes. You can use this feature when you do not have time or authorization to perform a full drive acquisition.
The logical imager produces one or more sparse VHD images that contain all of the file system data that was read. These VHD images can be imported into Autopsy or mounted by Windows. The imager also enumerates the user accounts on the system and can generate alerts if encryption programs exist.
The general workflow is:
- Configure logical imager using Autopsy. This will copy a configuration file specifying which files to collect and the logical imager executable to the target drive.
- Insert the drive into the target system and run logical imager. This will give you a folder containing the sparse VHD copy of the target system (or multiple VHDs if more than one drive was analyzed), a file containing user account information, and a record of which files generated alerts.
- Load the result of running logical imager into Autopsy to browse any matching files and see user account information.
Configuration
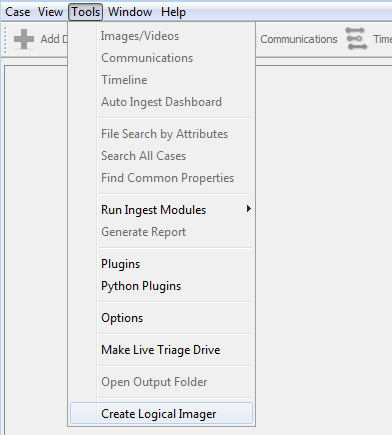
To start, open Autopsy and go to Tools->Create Logical Imager.
-
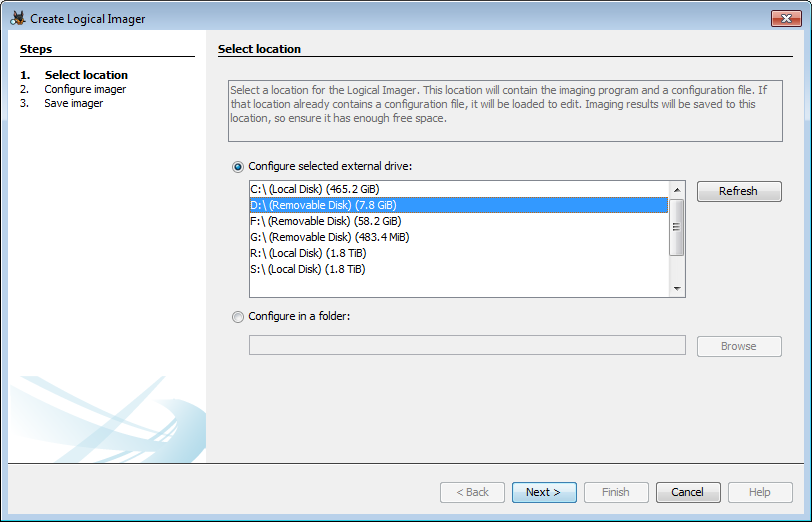
Configuring an external drive
The normal use case is to select a drive from the list under "Configure selected external drive." This will put the logical imager executable and a configuration file into the root directory of that drive once you finish the configuration. It is important to run the executable from the root of your drive because its presence on the drive makes the imager skip that drive during processing. MOVE THIS??
-
Configuring in a folder
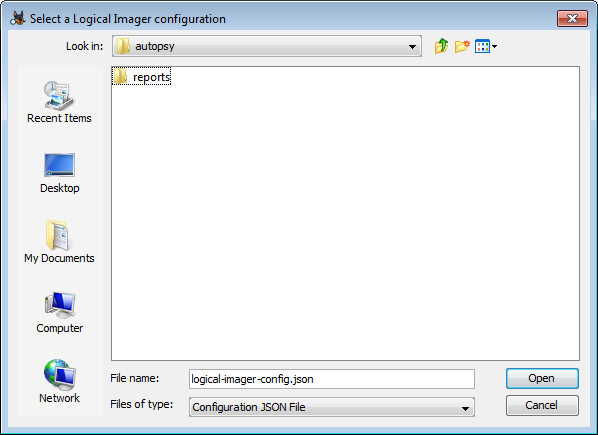
If you're not ready to set up your drive yet, or if you want to create a different configuration file, you can use the second option to browse to a folder or an existing configuration file. If you're creating a new file, browse to the folder you want to create it in. Notice that the configuration file has the default name "logical-imager-config.json". You can change this, but if you do you'll need to rename it after you copy it to your drive or use the command prompt to run the imager. See the section on Running from a Command Prompt.
In either case you can now configure your imager. If the configuration file already exists, this screen will be loaded with the current settings from the file.
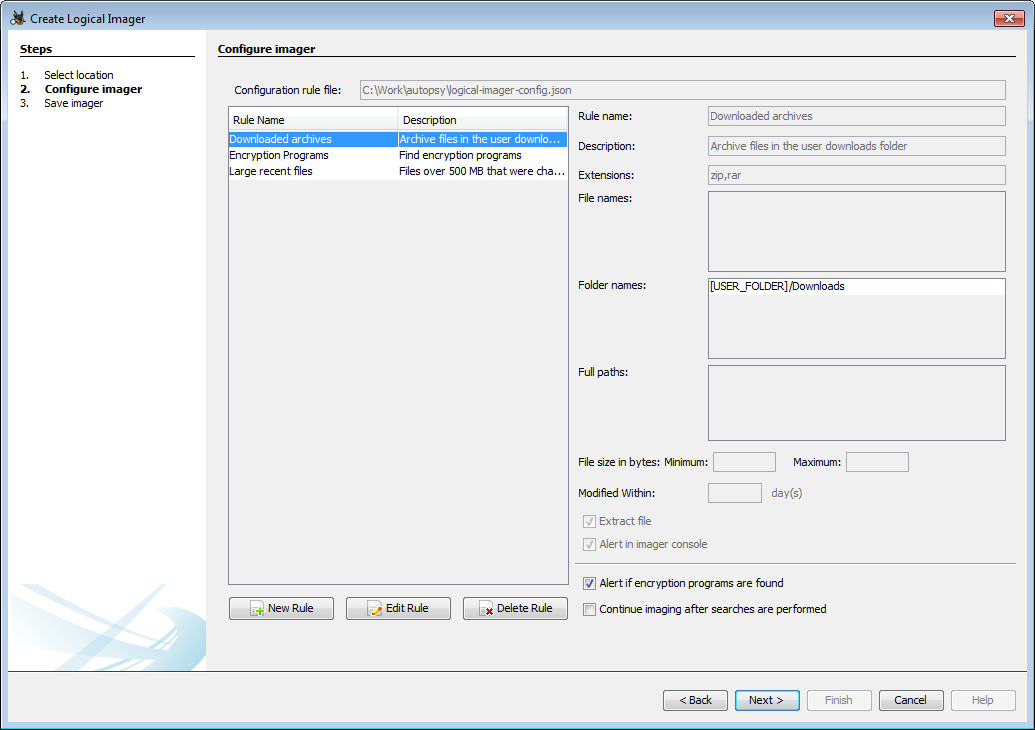
On the left side you can see each rule in the configuration file. Each of these rules will be applied against the live system. A rule has a name, an optional description, one or more conditions, and settings for what should happen when a file matching the rule is found. When you select a rule you'll see all the settings for that rule on the right side of the panel. You can edit or delete rules once you select them. There are also two global settings in the bottom right that apply to the configuration file as a whole:
- Alert if encryption programs are found - This will add a predefined rule to find encryption programs and alert and export any that are found. You will not be able to edit this rule.
- Continue imaging after searches are performed - By default, the logical imager will only copy sectors that it uses or that are part of matching files being exported. If this option is selected, logical imager will go back through the image after the rule matching is complete and copy over any remaining sectors. This will take longer to run and result in much larger VHD images.
To make a new rule, click on the "New Rule" button.
There are two rule types to choose from:
- Attribute rules allow you enter multiple conditions that must be true for a file to match
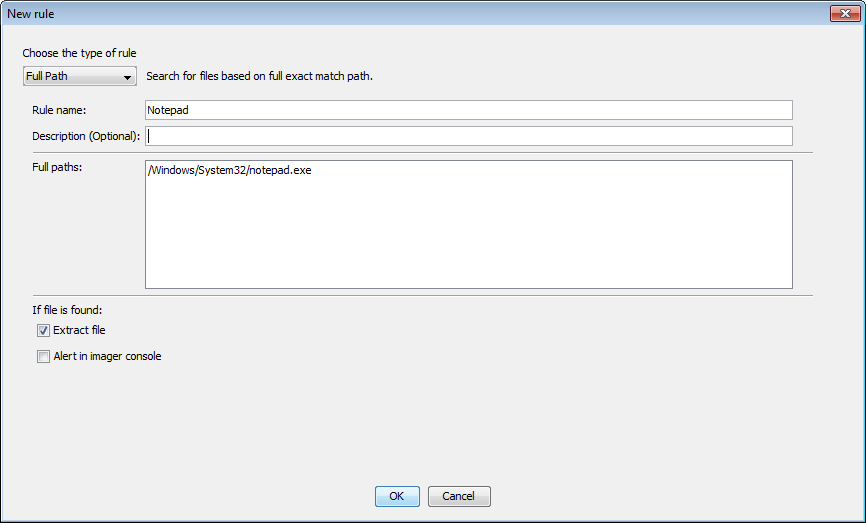
- Full path rules allow you to enter one or more full paths (path and file name) which must match exactly
For either rule type, you start by entering a rule name and optional description. You will also need to choose at least one action to take when a match is found.
- Alert in Imager console if rule matches - this will display the file data in the console and add it to the "alerts.txt" output file.
- Extract file if it matches a rule - this will ensure that the matching file's contents will be copied to the sparse VHD
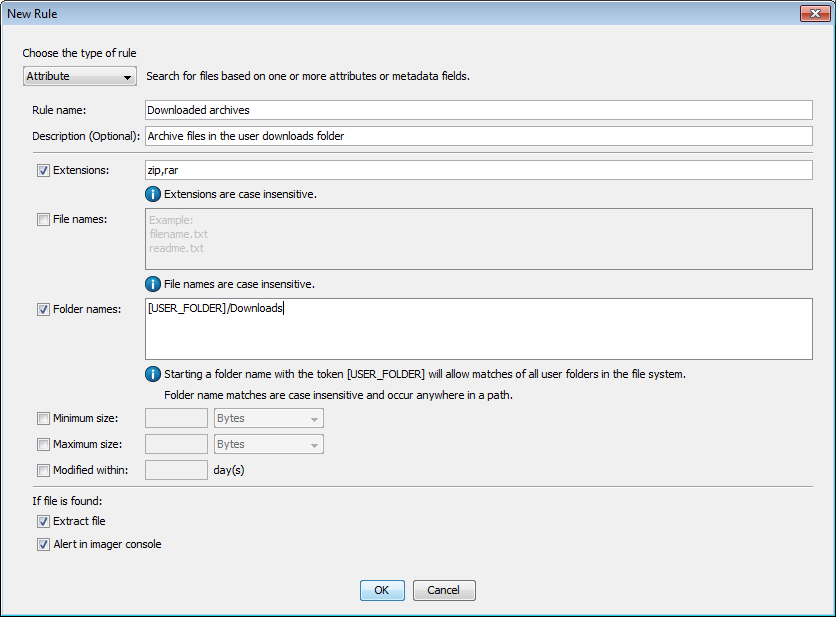
Attribute rules can have one or more conditions. All conditions must be true for a rule to match.
- Extensions - File must match one of the given extensions (comma-separated). Extensions are case-insensitive.
- File names - File must match one of the given file names (new line-separated). File names should include extensions and are case-insensitive.
- Folder names - File must match one of the given paths (new line-separated). The given path may be a substring of the file path. You can use "[USER_FOLDER]" to match any user folder on the system. For example, "[USER_FOLDER]/Downloads" will match the downloads folder in any user folder, such as "Users/username/Downloads".
- Minimum size / Maximum size - File must be in the given range. You can either both fields to specify a range or use just one to match all files larger or smaller than the given size.
- Modified Within - File must have been changed within the specified last number of days
Full path rules have a single condition.
- Full paths: File must exactly match one of the given full paths (new line-separated)
Running Logical Imager
Running with the Default Configuration
Using the defaults in the configuration process will create a drive with the config file (named "logical-imager-config.json") and the logical imager executable in the root folder of your drive.

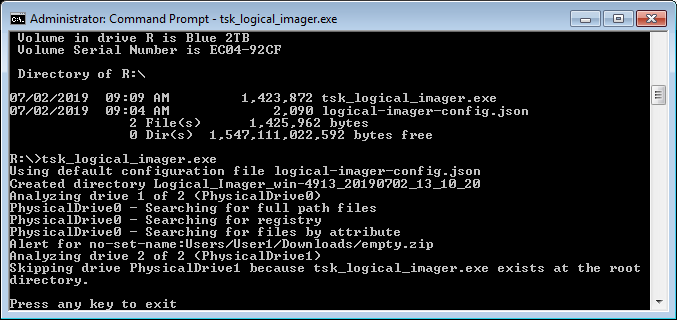
The default case is to run the logical imager on every drive except the one containing it. Note that the logical imager executable must be in the root directory for the drive to be skipped. To run the imager, right-click on "tsk_logical_imager.exe" and select "Run as administrator". This will open a console window where you'll see some information about the processing and if you set any rules to create alerts, you'll see matches in the console window as well. The window will close automatically when the processing is complete.
The logical imager will start writing the sparse VHD(s) and any other data to a directory next to the executable.

Running from a Command Prompt
To run the logical imager with custom settings, you'll need to first open a command prompt in administrator mode (right-click and then select "Run as administrator"). Then switch to the drive where logical imager is located. You can run using the default configuration by simply typing "tsk_logical_imager.exe".
If your configuration file is not named "logical-imager-config.json" (for example, if you have multiple configuration files for different situations), you'll need to specify the file name using the "-c" flag.

If you want to specify the drive to run on, you can use the "-i" flag. This can be helpful for testing your configuration file - you can create a small USB drive with files that should match your rules to ensure that everything is working correctly before using it on a real system. The following example shows how to only run on the "G" drive on this system:

Viewing Results
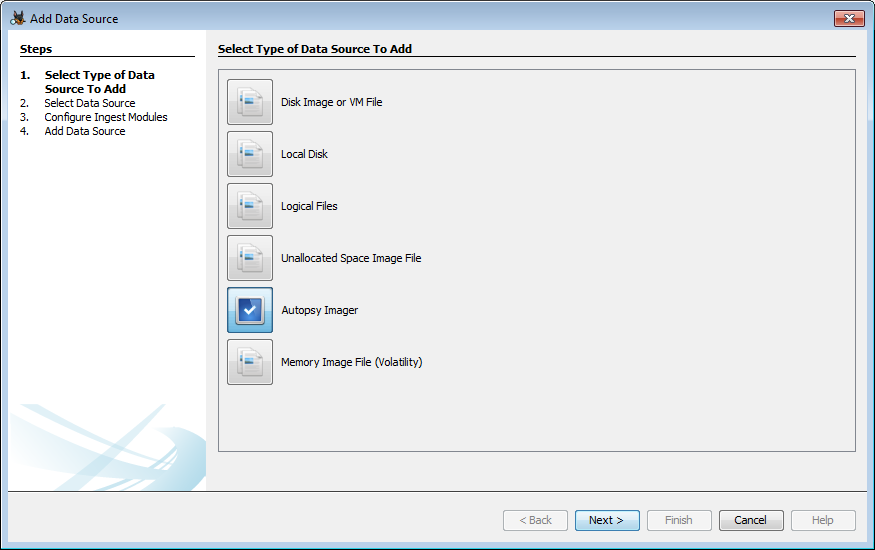
The logical imager results can be added to an Autopsy case as a data source. This brings in the sparse VHD(s) as a disk image and also adds the other files created by the logical imager. Select the "Autopsy Imager" option and proceed to the next page.
In the top section, you can see all the logical imager result folders in the root folder of each drive. Select the one you want to add and then hit the "Next" button.
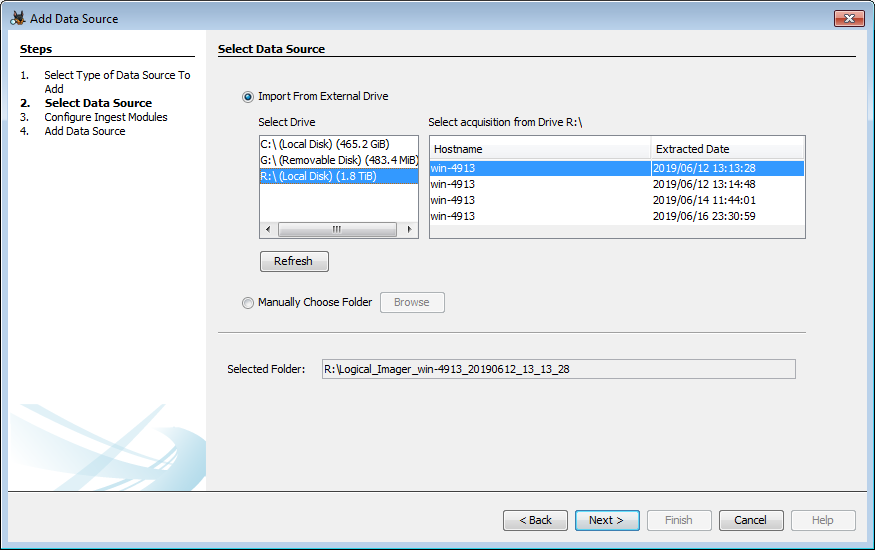
If your logical imager results are in a different location, select "Manually Choose Folder" and use the "Browse" button to locate your results.
In either case you'll get to configure the ingest modules to run. You can run any of them, but since your disk image may not be complete you may see more errors than normal. For example, the sparse VHD may contain the entire file allocation table but the actual data that goes with the files will be missing.
The alert and user files created by the logical imager can be found under the Reports section of the Tree Viewer.