Table of Contents
Overview
The discovery tool shows images, videos, documents, or domains that match a set of filters configured by the user. You can choose how to group and order your results in order to see the most relevant data first.
Prerequisites
We suggest running all ingest modules before launching discovery, but if time is a factor the following are the modules that are the most important. You will see a warning if you open discovery without running the File Type Identification Module, the Hash Lookup Module, and the Picture Analyzer Module.
Required ingest modules:
- File Type Identification Module for image, video, and document searches
- Recent Activity Module or iOS Analyzer (iLEAPP) for domain searches
Optional ingest modules:
- Central Repository Module - Needed to use the Past Occurrences Filter
- Picture Analyzer Module - Needed to use the Possibly User Created
- Hash Lookup Module - Needed to use the Hash Set Filter and to de-duplicate files
- Interesting Files Identifier Module - Needed to use the Interesting Item Filter
- Object Detection - Needed to use the Object Detected Filter
- Keyword Search Module - Improves document summaries
- Embedded File Extraction Module - Allows display of an image contained in a document
Running Discovery
To launch discovery, either click the "Discovery" icon near the top of the Autopsy UI or go to "Tools", "Discovery". There are three steps when setting up discovery, which flow from the top of the panel to the bottom:
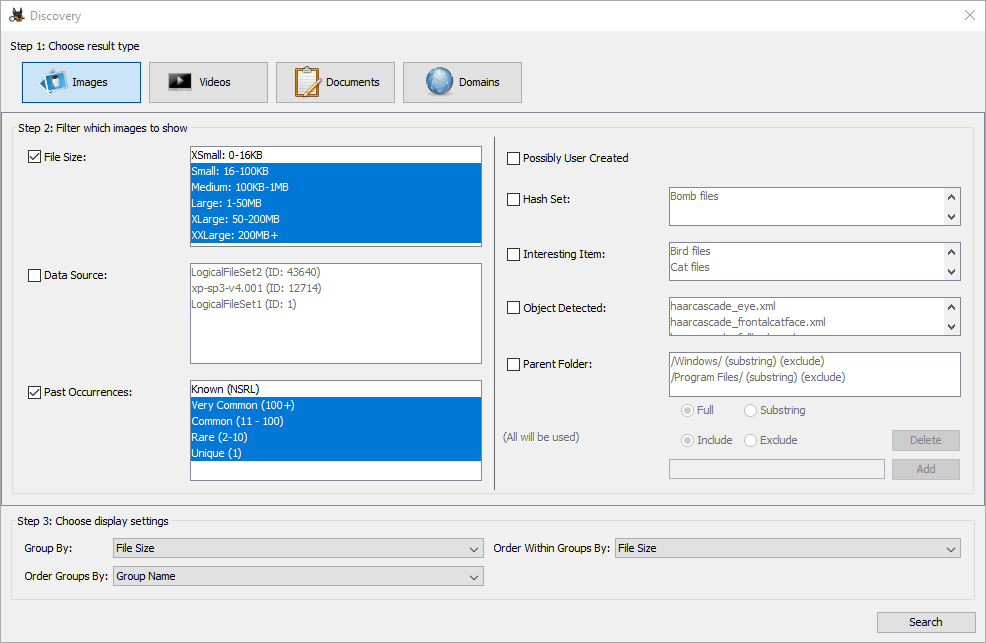
Once everything is set up, use the "Search" button at the bottom right to display your results.
Result Type
The first step is choosing whether you want to display images, videos, documents, or domains. The first three (images, videos, and documents) will return file results of the given type. The file type is determined by the MIME type of the file, which is why the File Type Identification Module must be run to see any results. Switching between the result types will reset the filters.

Filtering
The second step is to select and configure your filters. The available filters will vary depending on the result type. For most filters, you enable them using the checkbox on the left and then select your options. Multiple options can be selected by using CTRL + left click. Results must pass all enabled filters to be displayed.
File Size Filter
The file size filter lets you restrict the size of your results. The options are different for the different file types - an extra small image might be under 16 KB while an extra small video is anything under 500 KB.

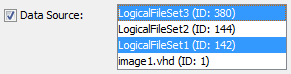
Data Source Filter
The data source filter lets you restrict which data sources in your case to include in the results.
Past Occurrences Filter
The past occurrences filter uses the central repository and known hash sets (for file type searches) to restrict how commom/rare an entry must be to be included in the results. For file type searches the "Known Files" option is disabled by default, meaning that any file matching the NSRL or other white-listed hash set will not be displayed.
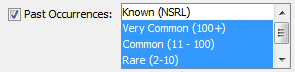
The counts for the rest of the options are based on how many data sources in your central repository contain a copy of this file (based on hash) or domain. If a result only appears in one data source in the current case, then it will match "Unique(1)". If it has only been seen in a few other data source, it will match "Rare(2-10)". Note that it doesn't matter how many times a result appears in each data source - a result could have twenty copies in one data source and still be "unique".
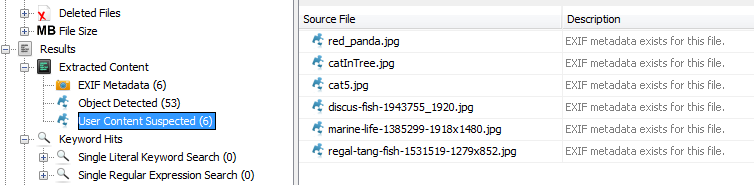
Possibly User Created
The possibly user created filter restricts the results to files that suspected to be raw images or videos.

This means the file must have a "User Content Suspected" result associated with it. These primarily come from the Picture Analyzer Module.
Hash Set Filter
The hash set filter restricts the results to files found in the selected hash sets. Only notable hash sets that have hits in the current case are listed. See the Hash Lookup Module page for more information on creating and using hash sets.

Interesting Item Filter
The interesting item filter restricts the results to files found in the selected interesting item rule sets. Only interesting file rule sets that have results in the current case are listed. See the Interesting Files Identifier Module page for more information on creating and using interesting item rule sets.

Object Detected Filter
The object detected filter restricts the results to files that matched the selected classifiers. Only classifiers that have results in the current case are listed. Note that currently the built-in Object Detection ingest module only works on images, so you should generally not use this filter with videos. See the Object Detection page for more information on setting up classifiers.

Parent Folder Filter
The parent folder filter either restricts the path the files can be on. This filter works differently than the others in that the individual options do not have to be selected - every rule that has been entered will be applied.
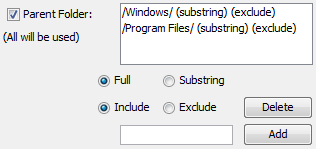
You can enter paths that should be included and paths that should be ignored. For both you then specify whether the path string you entered is a full path or a substring. For full path matches you'll need to include the leading and trailing slashes. Full path matches are also case-sensitive.
The default options, shown above, will exclude any file that has a "Windows" folder or a "Program Files" folder in its path. It would exclude files like "/Windows/System32/image1.jpg" but would not exclude "/My Pictures/Bay Windows/image2.jpg" because the slashes around "Windows" force it to match the exact folder name.
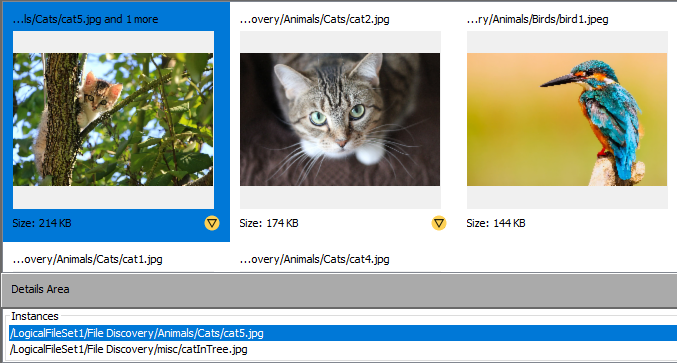
Here is another example. This rule was created with "Full" and "Include" selected.
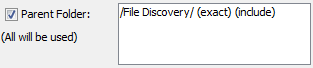
This matches the file "/LogicalFileSet2/File Discovery/bird1.tif" but not any images in subfolders under "File Discovery".
When there are multiple path options in the filter, they will be applied as follows:
- The file path must match every "exclude" rule to pass
- If any "include" rules exist, the file path must match at least one "include" rule to pass
This allows you to, for example, make rules to include both the "My Documents" and the "My Pictures" folders.
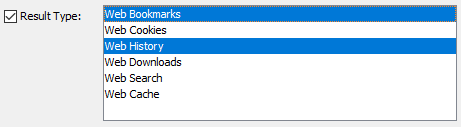
Result Type Filter
The result type filter is for domain searches only and can be used to restrict which types of web results the domains can come from.
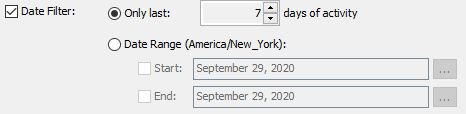
Date Filter
The date filter is for domain searches only and restricts the search to domains that were accessed within a given time frame. This time frame can either be the last N days (relative to the current date) or have a specific start and/or end date.
Grouping and Sorting
The final options are for how you want to group and sort your results.

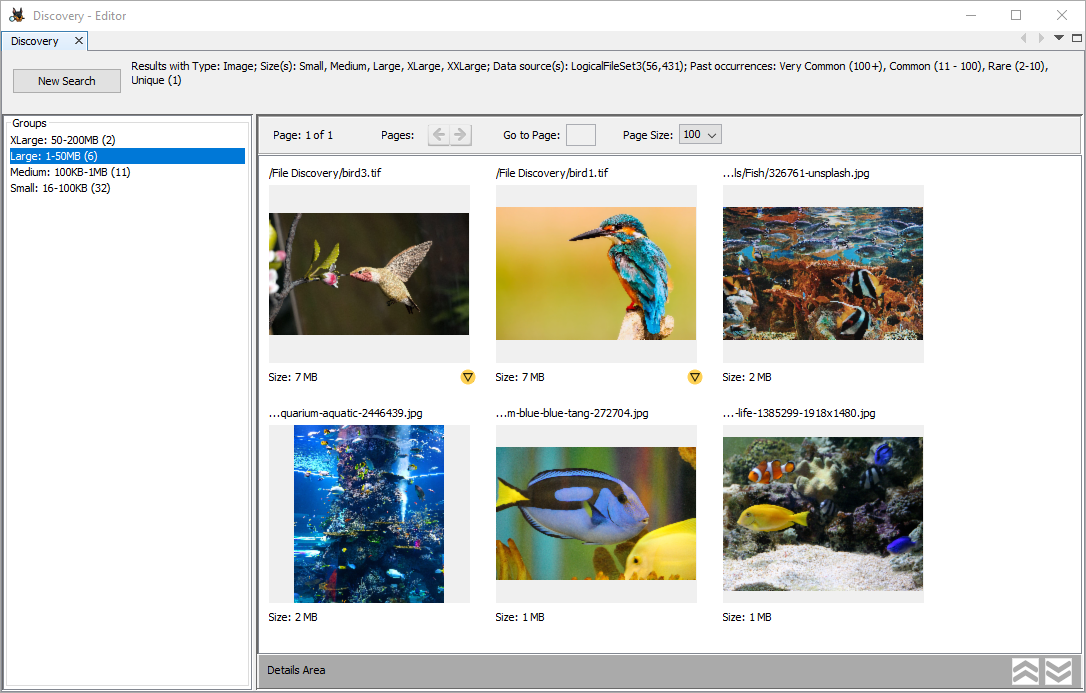
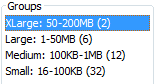
The first option lets you choose the top level grouping for your results and the second option lets you choose how to sort them. The groups appear in the left column of the results window. Note that some of the grouping options may not always appear - for example, grouping by past occurrences will only be present if the Central Repository is enabled, and grouping by hash set will only be present if there are hash set hits in your current case. The example below shows the groups created using the default options (Image search, group by file size, order groups by group name):
In the case of file size and past occurrences, ordering by group name is based on the natural ordering of the group (largest to smallest or most rare to most common). For the other groups it will be alphabetical. Ordering groups by size will sort them based on how many files each group contains, going largest to smallest. For example, here we've grouped by interesting item set and ordered the groups by their size.
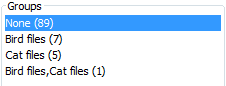
The interesting items filter was not enabled so most images ended up in the "None" group, meaning they have no interesting file result associated with them. The final group in the list contains a file that matched both interesting item rule sets.
The last grouping and sorting option is choosing how to sort the results within a group. This is the order of the results on the right side of the results window after selecting a group from the left column. Note that due to the merging of results with the same hash in that panel, ordering by file name, path, or data source can vary. See the De-duplication section below for more information.
Viewing Results
Overview
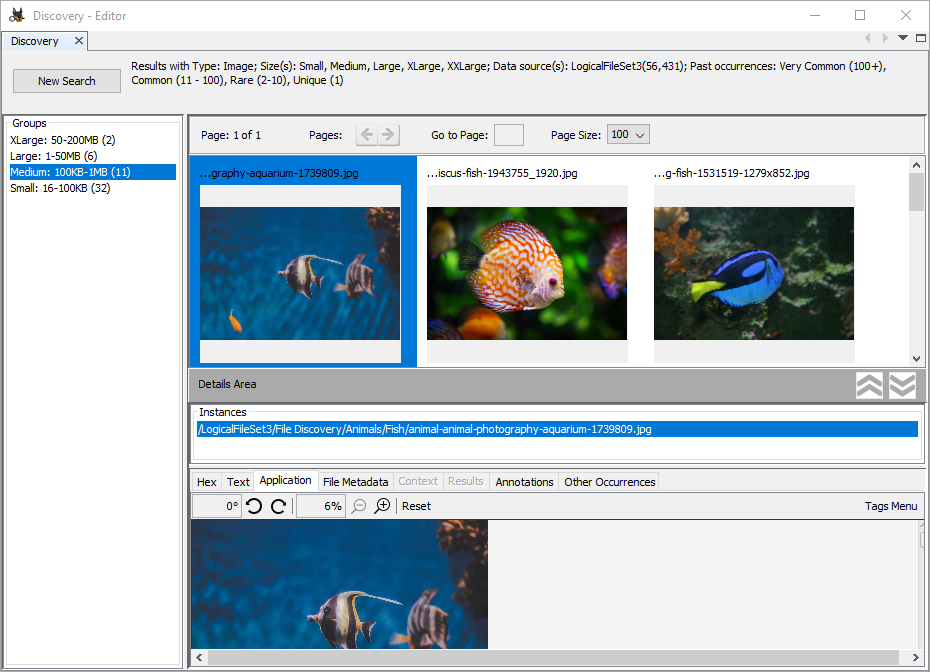
Once you select your options and click "Search", you'll see a new window with the list of groups on the left side. Selecting one of these groups will display the results from that group on the right side. For image, video, and document searches, selecting a result will cause a panel to rise showing more details about each instance of that result. You can manually raise and lower this panel using the large arrows on the right side of the divider. This panel is disabled for domain searches.
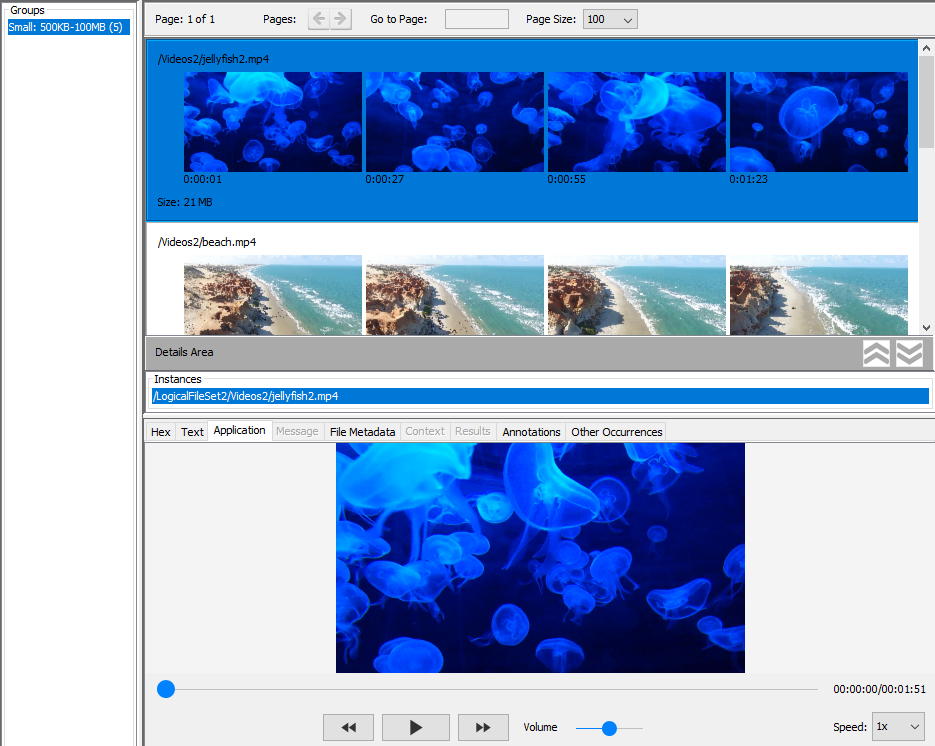
If your results are images, you'll see thumbnails for each image in the top area of the right panel.
If your results are videos, each result will display four thumbnails from the video.
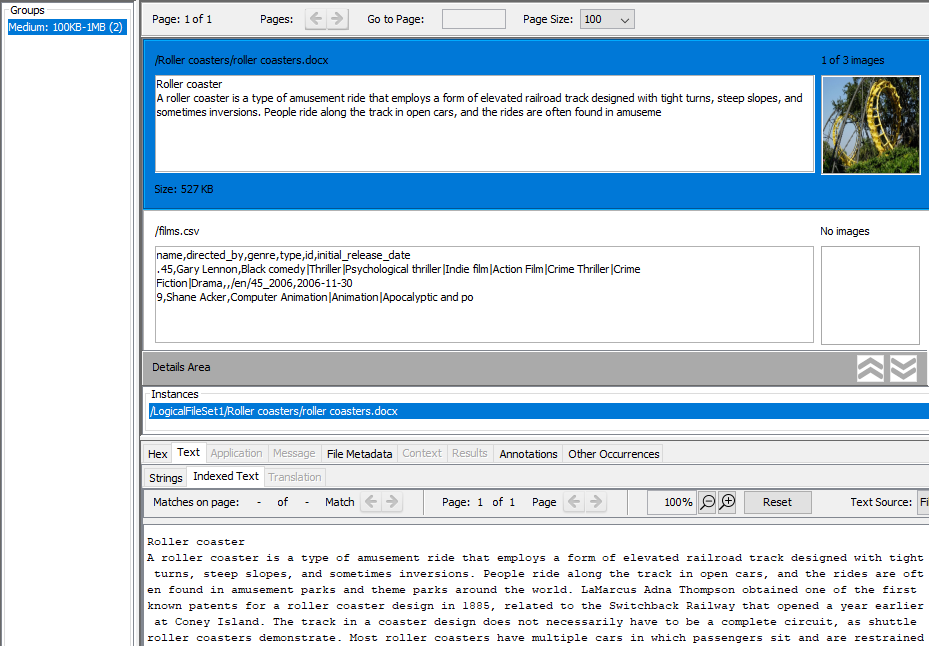
If your results are documents, you'll see part of the document text. If the Embedded File Extraction Module found any images in the document you'll see a thumbnail of the largest of them displayed on the right side along with a count of how many images were extracted from the document.
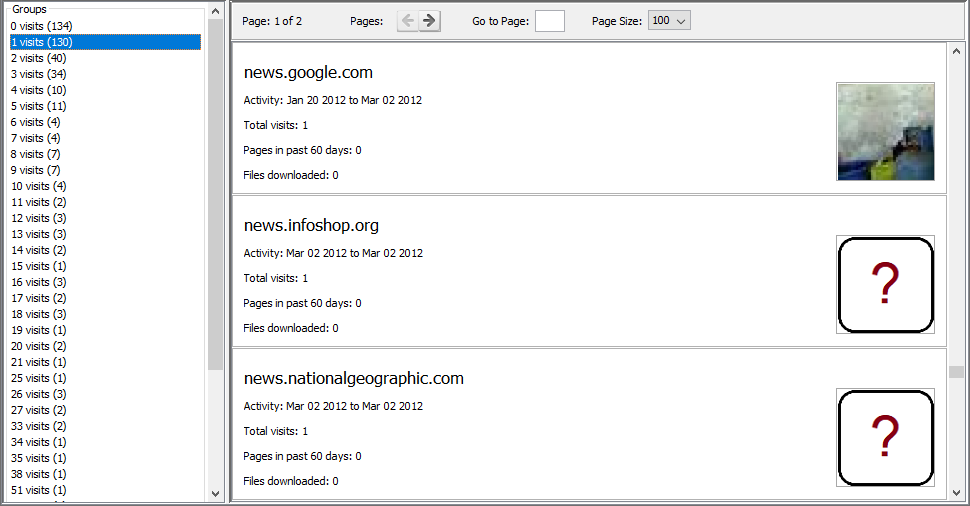
If your results are domains, you'll see information about each domain. If there is an image associated with that domain it will be displayed on the right.
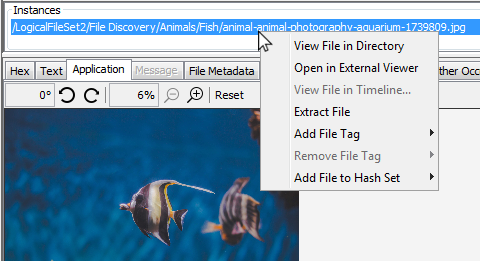
For image, video, and document searches, when you select a result from the top of the right panel, you'll see the path to the corresponding file(s) in the "Instances" panel below the thumbnails. There may be more than one file instance associated with a result - see the De-duplication section below. You can right-click on files in the instances panel to use most of options available in the normal Result Viewer.
The bottom section of the panel is identical to the standard Content Viewer and displays data corresponding to the file instance selected in the middle of the panel.
De-duplication
This section only applies to image, video and document searches.
Assuming the Hash Lookup Module module has been run, all files in a result group with the same hash will be merged together under a single instance. The file path to one of the instances will be displayed along with a note such as "and 1 more" indicating how many duplicates were found. Selecting the file will display each instance in the middle section of the panel.
Clicking on a particular instance will load data for that file in the content viewer area at the bottom.
Note that files in different groups will not be merged together or appear under the instances list of each other. For example, if you choose to group by parent folder and have two instances of a file with the same hash but in different folders, each will appear once under its parent folder. Grouping by file size (the default) will always merge every instance of the same file.
Status Icons
This section only applies to image, video and document searches.
A number of icons may be displayed in the bottom right of the thumbnails to help point out notable results. Hovering over the icon will display a message explaining why the icon is present. In the image below, the yellow icon is present because the file is associated with an interesting item set.
Most of the icons match what would be displayed in the "S" column of the normal Result Viewer.
| Icon | Usage |
|---|---|

| Interesting file set match or normal file tag |

| Notable hash set hit or notable file tag |
| Deleted file (every instance is deleted) |
Paging
If the group you select has many results, the results will be split up into pages. You can use the left and right arrows to move between pages or type in the page number you wish to go to. You can adjust the number of results per page using the drop down box in the upper right.
