Overview
A portable case is a partial copy of a normal Autopsy case that can be opened from anywhere. It contains a subset of the data from its original case and has been designed to make it easy to share relevant data with other examiners.
The general use case is as follows:
- Alice is analyzing one or more data sources using Autopsy. She tags files and results that are of particular interest.
- Alice wants to share her findings with Bob but is unable to send him the original data sources because he shouldn't see them or the originals are too big.
- Alice creates a portable case which will contain only her tagged files and results, plus any files associated with those results, and sends it to Bob. She could also choose to include interesting files or results.
- Bob can open the portable case in Autopsy and view all files and results Alice tagged, and run any of the normal Autopsy features.
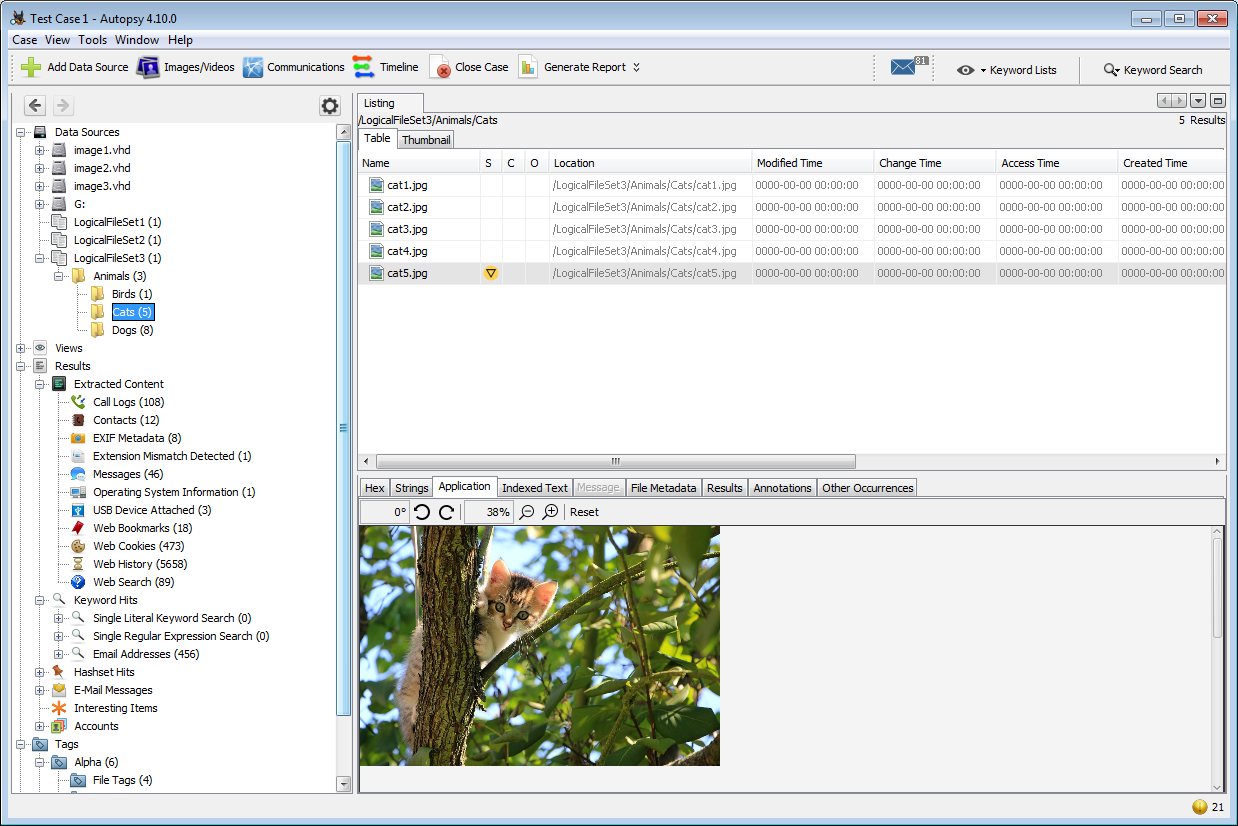
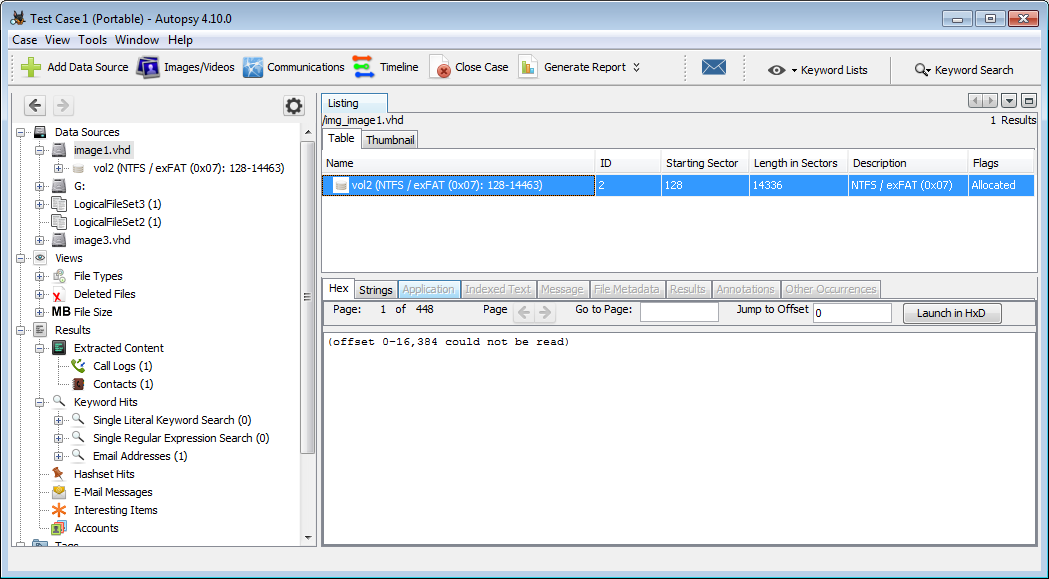
For example, Alice's original case could look like this:
The portable version could like this:
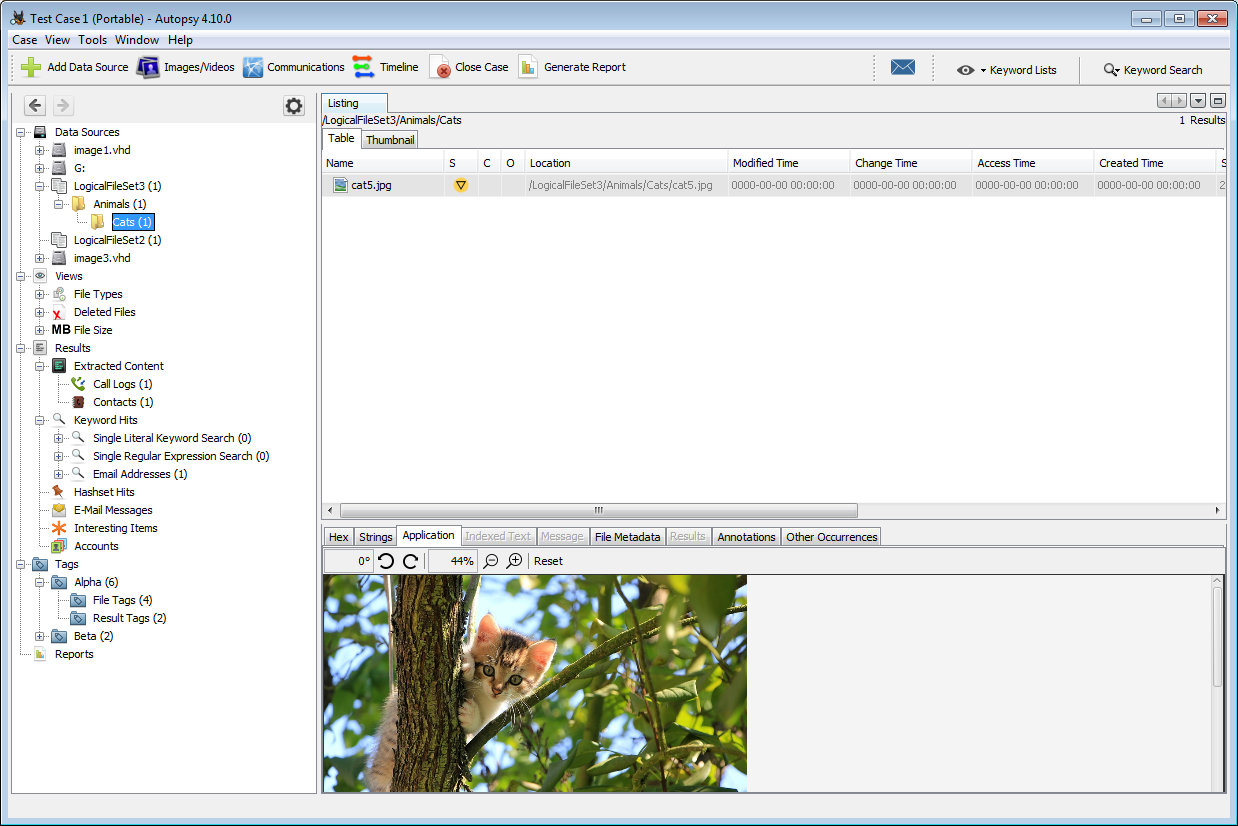
Alice only tagged eight files and results and her case had no interesting items, so most of the original content is no longer in the case. Some of the data sources had no tagged items so they're not included at all. The file structure of any tagged files is preserved - you can see that the tagged image in the screenshot is still in the same location, but the non-tagged files are gone. Note that although the original images (such as "image1.vhd") appear in the tree, their contents are not included in the portable case.
Creating a Portable Case
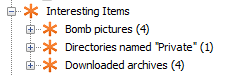
A portable case can contain tagged files and results and data from the Interesting Items section of the Tree Viewer. You'll be able to choose which of the Interesting Item sets you want to include in the portable case.
You can tag any additional files you want to include in the portable case. See the Tagging page for details on how to create tags. You can see what tags you've added in the Tree Viewer.

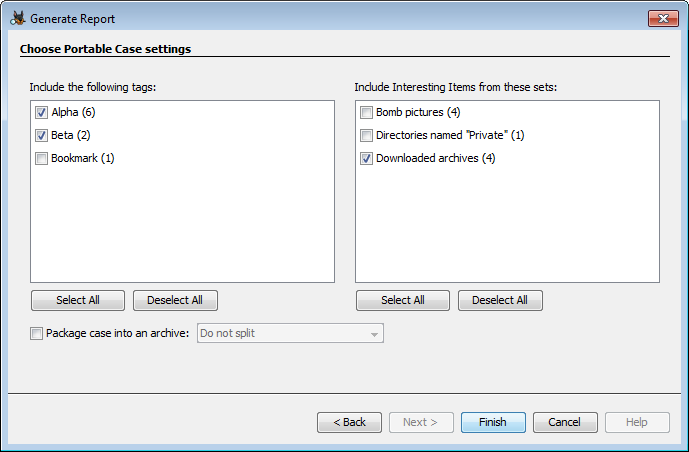
Portable cases are created through the Reporting feature. The Generate Report dialog will display a list of all tags and interesting file sets that are in use in the current case and you can choose which ones you would like to include. At the bottom you can choose to optionally package the case. Choosing to package the case without chunking will simply compress the portable case in a single archive that can be extracted with common compression programs. If you choose split the packaged case into multiple files, you will need to use the "Unpackage Portable Case" option before loading it. This will be discussed in the next section.
The portable case will be placed in the "Reports" folder in the current case.
Here you can see an unpackaged portable case. It will be named with the original case name plus "(Portable)". The portable case is initially missing many of the normal Autopsy folders - these will be created the first time a user opens it.
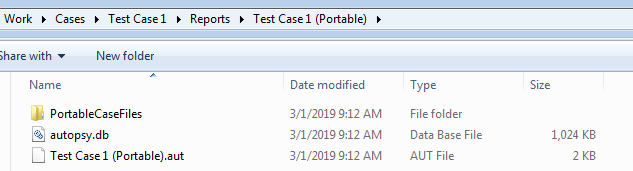
If you packaged the portable case but did not choose to split it into chunks, you'll have a single .zip file. If you chose to split the packaged case, you'll have one or more files starting with extension .zip.001.

Using a Portable Case
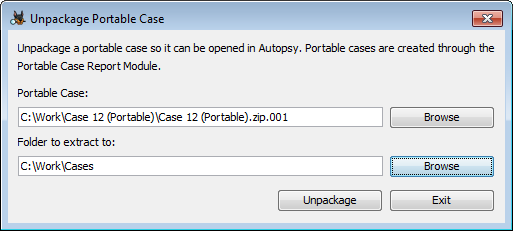
If your portable case was packaged, you'll first need to unpackage it. Open the "Case" menu and then select "Unpackage Portable Case". This will bring up a dialog where you can browse to your packaged case and select where to extract it to. Once unpackaged you can open it normally.
Portable cases generally behave like any other Autopsy case. You can run ingest, do keyword searches, use the timeline viewer, etc. One point to note is that while the original data source names appear in the case, the data sources themselves were not copied into the portable case.
This may cause warning or error messages when using ingest modules that run on the full image, such as the Data Source Integrity Module. You will also not be able to view the data sources in the content viewer.
You can also add additional data sources to the portable case if you wish. The case will no longer be portable, but if desired you could generate a new portable case that will include tagged files and results from the new data sources as well as the original case.
Inside a Portable Case
A portable case is a folder, just like any other Autopsy case. It contains a SQLite database (just like a normal Autopsy case) with rows for only the items that the user selected to be in the portable case. For example, if a user tagged a file and included that in the portable case, the database will have a row for the tag, a row for the file, a row for the file system the file was in, a row for the volume system, a row for the image etc. Everything assocated with the tag is in there and you should see those items in Autopsy.
A copy of any tagged file is made into the case folder and the SQLite database will refer to it. This allows you to examine the file contents without the original data source.
Because a portable case is really just a subset of the original case, nearly all other Autopsy operations work as normal.