Overview
Auto ingest allows one or many computers to process data sources automatically with minimal support from a user. The resulting multi-user cases can be opened and reviewed by analysts, using any of the normal functions in Autopsy.
The Experimental Module must be enabled to run use automated ingest.
There are three types of computers in an Automated Processing Deployment:
- Automated Ingest Node: These computers are responsible for monitoring the Shared Images Folder and detecting when new images have been copied in. Each writes its results to the Shared Cases Folder.
- Examiner Node: These computers can open a case during processing or after it has been analyzed by the Automated Ingest Node. They allow the examiner to review the results, tag files, and perform additional analysis as needed.
- Services/Storage Node: These computers run the services needed for multi-user cases, hold the images to be processed and store the analyzed Autopsy cases.
The general workflow is as follows:
- Disk images or other types of data sources are added to the shared images folder. This folder will contain all the disk and phone images that are copied into the system. They must be copied into here before they can be analyzed. As more than one machine may need to access this folder across the network, use UNC paths (if possible) to refer to this folder.
- A manifest file is added for each data source that is to be processed.
- An auto ingest node finds that manifest file and begins processing the data source. It will make a case in the shared cases folder if there is not one there already. This folder will contain all of the analysis results after automated analysis has been performed on the images. This folder will not contain the images, those will stay in the Shared Images Folder. As more than one machine may need to access this folder across the network, use UNC paths (if possible) to refer to this folder.
- An analyst on an examiner node opens the case and starts their analysis. This can happen while an auto ingest node is processing data or afterwards.
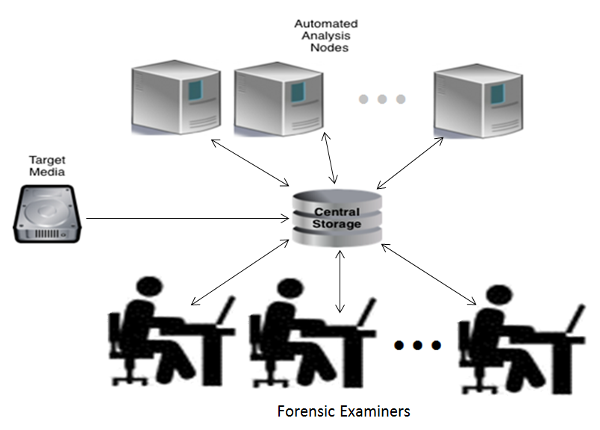
An Automated Processing Deployment could have an architecture, such as this:
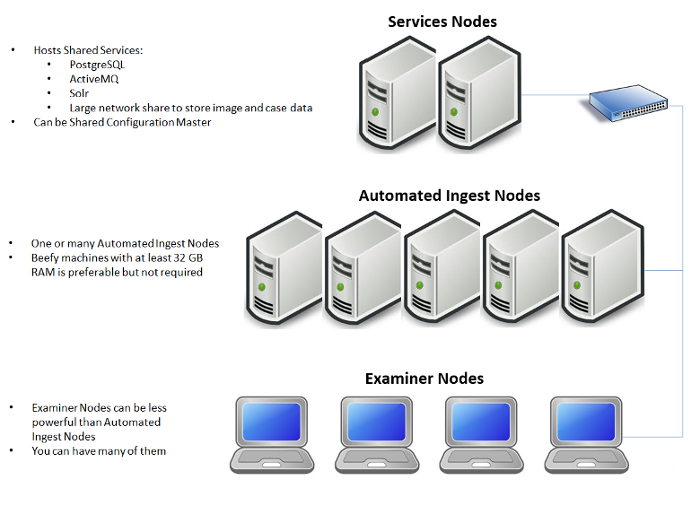
Another illustration, including the network infrastructure, is shown below:
Configuration
Configuring a group of computers for auto ingest is described on the Auto Ingest Configuration page.
Examiner Node Usage
An examiner node in an auto ingest environment is generally the same as any normal Autopsy client set up for multi-user cases. Any number of examiner nodes can open cases that have been created by the auto ingest nodes. The cases do not need to be complete.
The examiner can open the auto ingest dashboard through the Tools menu. This allows the user to see what cases and data sources are scheduled, in progress, or done.
Auto Ingest Node Usage
Preparing Data for Auto Ingest
Users will manually copy images to the source images folder (using subfolders if desired) and schedule them to be ingested by creating one file in the folder alongside the image to be ingested. This file is a manifest file describing the image. This file's name must end in "_Manifest.xml."

The following is an example of an Autopsy manifest file. Line breaks/spaces are not required, but are shown here for better human readability.
<?xml version="1.0" encoding="UTF-8" standalone="no"?>
<AutopsyManifest>
   <CaseName>XperiaCase</CaseName>
   <DeviceId>50549</DeviceId>
   <DataSource>mtd3_userdata.bin</DataSource>
</AutopsyManifest>
The following is a description of each required field:
- CaseName: Case name. Multiple data sources can belong to the same case.
- DeviceId: (Optional) A globally unique ID representing device this data source came from. This can be an integer or a UUID.
- DataSource: File name of the data source. Does not include the path.
Any amount of additional data may be included in the XML file as long as the fields above are present.
Manifest files can be automatically generated by using the Manifest Tool.
Running an Auto Ingest Node
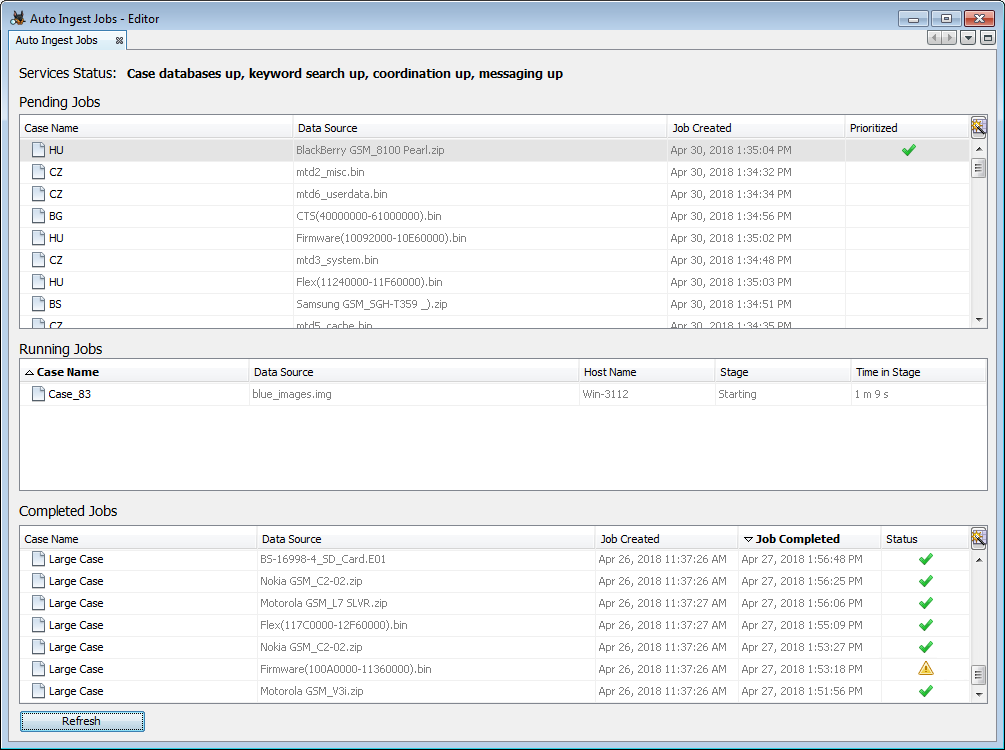
When auto ingest mode is enabled, Autopsy will open with a different UI than normal, allowing the user to see what cases are being processed, which are done, and which are next in the queue. You can also change the priority of cases and reprocess cases that may have had an error.
The user must press the "Start" button to begin the auto ingest process. Note that if the computer running Autopsy in auto ingest mode is restarted, someone must log into it to restart Autopsy. It does not start by itself. When "Start" is pressed, the node will scan through the Shared Images folder looking for manifest files. This scan happens periodically when ingest is running. It can also be started manually using the "Refresh" button.
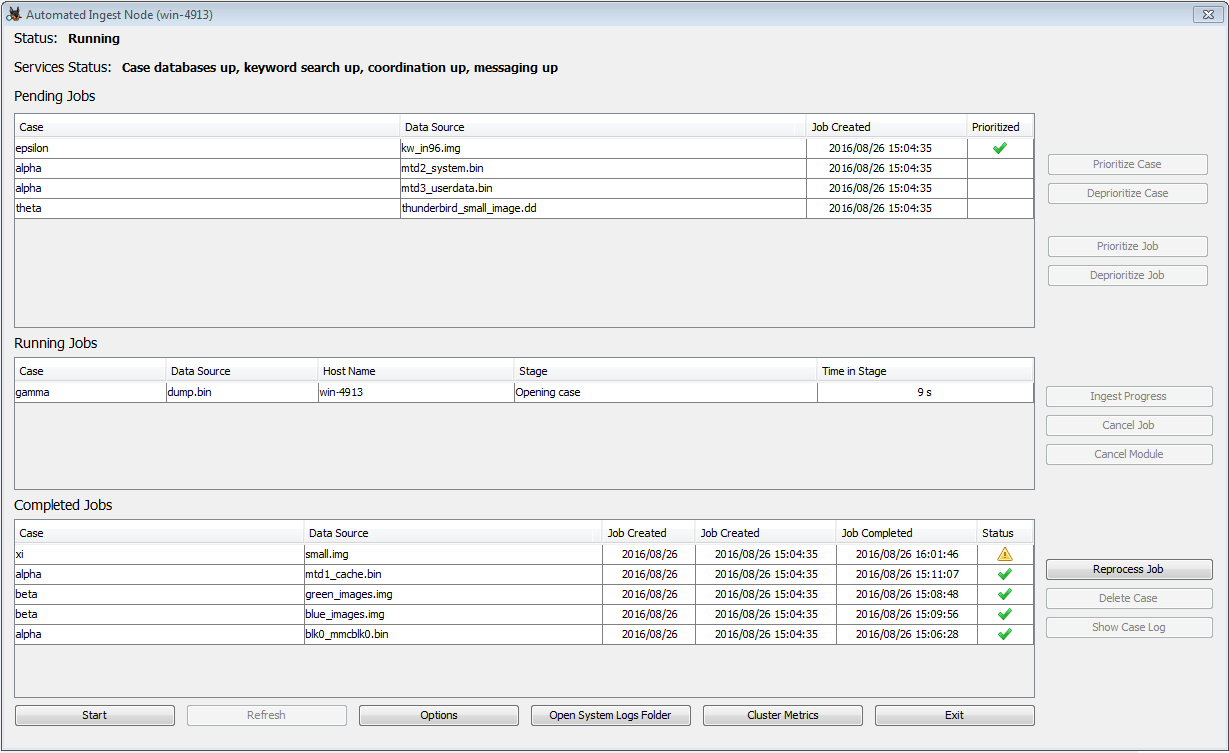
The UI for the auto ingest node will display what images are scheduled for analysis, what is currently running, and what has been completed. If a newly added image should be the highest priority, then you can select it and choose "Prioritize Case". This will prioritize all images within the same case to be top priority. You may also prioritize only a single data source (job) using the "Prioritize Job" button in the same manner. If you have prioritized something by mistake, the "Deprioritize" buttons will undo it.
In the middle area, you can see the currently running jobs. You have the option of cancelling an entire image that is being analyzed or to cancel only the current module that is running. The latter is used when one of the modules has been running for too long and you think that the module is having trouble with the image and will never complete. If the auto ingest node loses connection to either the database or Solr services it will automatically cancel the currently running job and will pause processing. Once the connectivity issue has been resolved you must manually resume processing.
If an error occurs while processing a job, or if a job was set up incorrectly, the "Reprocess Job" button can be used to move a completed job back into the Pending Jobs table, where it can be prioritized if desired. No case data is deleted which may result in some duplication in the results.
"Delete Case" will remove a case from the list and remove all of its data. This will not remove the original image, manifest file, or anything else from the input directory. A case can not be deleted if it is currently open in any Examiner Node or if an auto ingest node is currently working on a job related to the case. Care should be used with the delete case button. Note that once a case is deleted the path to its data sources must be changed before they can be reprocessed (i.e., rename the base folder).
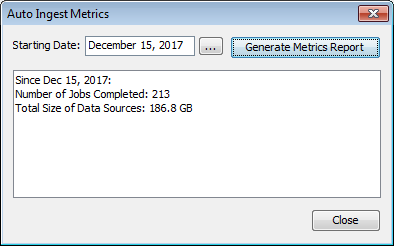
The "Auto Ingest Metrics" button displays processing data for all of the auto ingest nodes in the system from a user-entered starting date.
Auto Ingest Node Administration
See the Auto Ingest Administration for information on how to enable administrator features.