Overview
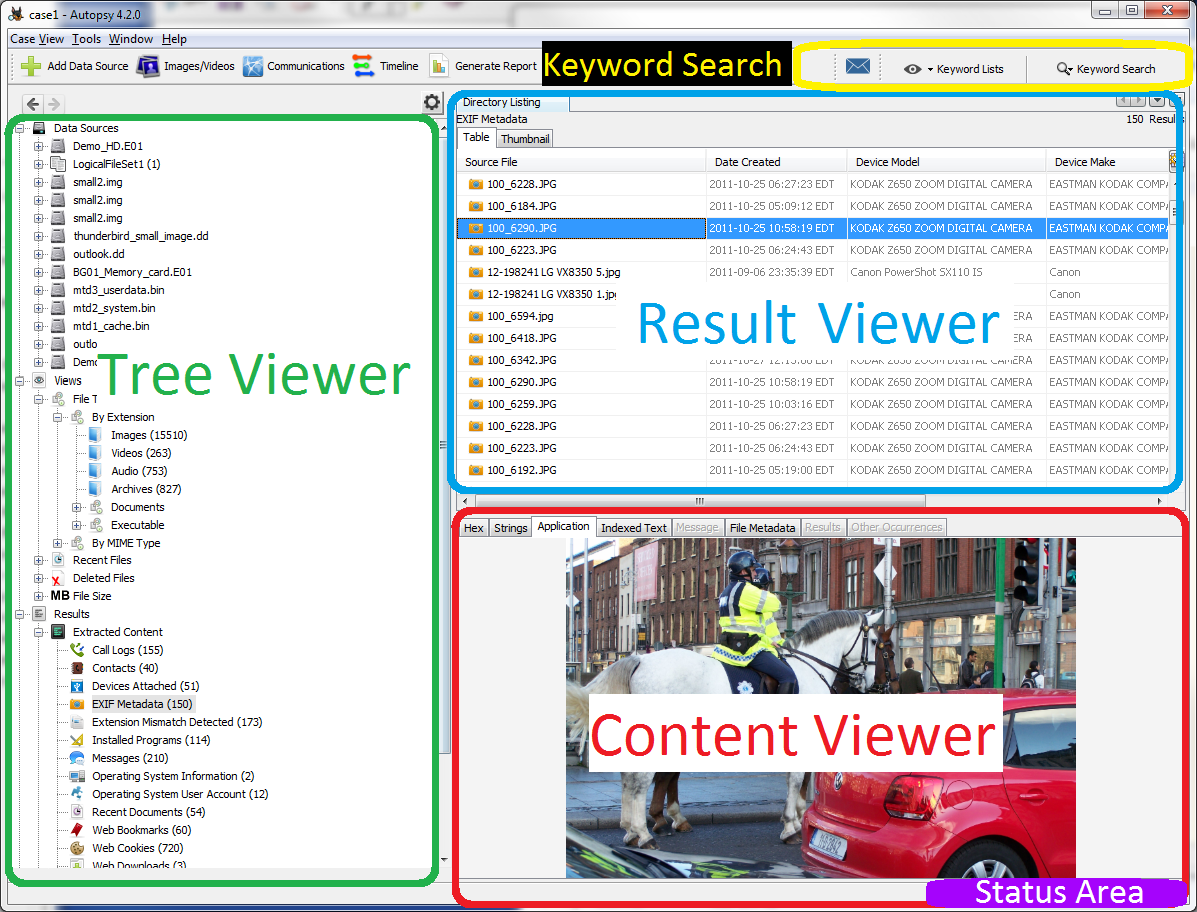
The major areas in the Autopsy User Interface (UI) are:
- Tree Viewer, shown outlined in green below
- Result Viewer, shown outlined in blue below
- Content Viewer, shown outlined in red below
- Keyword Search, shown outlined in yellow below
- Status Area, shown in solid purple below
You can customize how data is shown in the UI through the View Options panel.
Tree Viewer
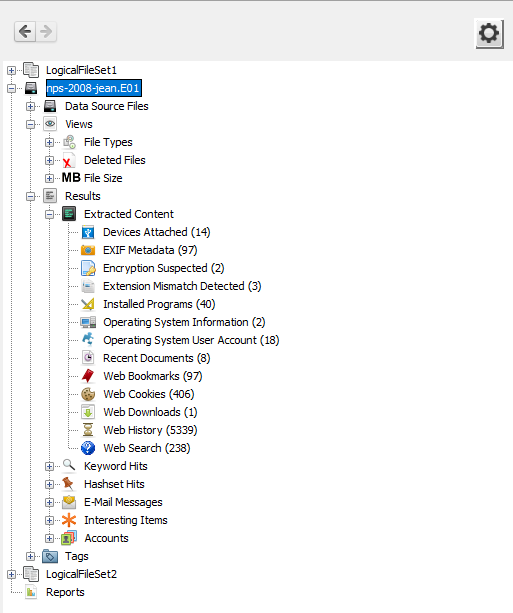
The tree on the left-hand side is where you can browse the files in the image and find saved results from automated procedures (ingest). The tree has five main areas:
- Data Sources: This shows the directory tree hierarchy of the file systems in the images. You can navigate to a specific file or directory here. Each data source added is represented as a drive. If you add a data source multiple times, it shows up multiple times.
- Views: Specific types of files from the data sources are shown here, aggregated by type or other properties. Files here can come from more than one data source. Look here for files of a specific type or property.
- Results: Where you can see the results from the background ingest tasks and you can see your previous search results. Go here to see what was found by the ingest modules and to find your previous search results.
- Tags: Where files and results that have been tagged are shown
- Reports: References to reports that you have generated or that ingest modules have created show up here
You can also use the "Group by data source" option available through the View Options to move the views, results, and tags subtrees under their corresponding data sources. This can be helpful on very large cases to reduce the size of each node.
Data Sources
The Data Sources section shows each data source that has been added to the case, in order added (top one is first). Right clicking on the various nodes in the Data Sources section of the tree will allow you to get more options for each data source and its contents.
Unallocated space is chunks of the file system that is currently not being used for anything. Unallocated space can store deleted files and other interesting artifacts. On the actual image, Unallocated space is stored in blocks with distinct locations on the system. However, because of the way various carving tools work, it is more ideal to feed them a single, large unallocated file. Autopsy provides access to both methods of looking at unallocated space.
- Individual blocks in a volume There is a folder named "Unalloc". This folder contains all the individual unallocated blocks as the image is storing them. You can right click and extract them the same way you can extract any other type of file in the Directory Tree.
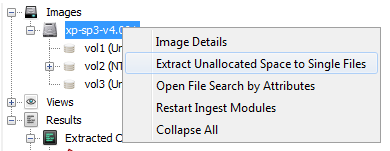
- Single files Right click on a volume and select "Extract Unallocated Space as Single File" to concatenate all the unallocated files in the volume into a single, continuous file. (If desired, you can right click on an image, and select "Extract Unallocated Space to Single Files" which will do the same thing, but once for each volume in the image).
An example of the single file extraction option is shown below.
Views
Views filter all the files in the case by some external property of the file, not by any internal analysis of the file.
- File Type Sorts files by file extension or MIME type, and shows them in the appropriate group. For example, .mp3 and .wav both end up in the "Audio" group.
- Recent Files Displays files that are accessed within the last seven days the user had the device.
- Deleted Files Displays files that have been deleted but the names have been recovered.
- File Size Sorts files based upon size. This can give you an idea where to look for files you are interested in.
Results
- Extracted Content: Many ingest modules will place results here; EXIF data, GPS locations, or Web History for example
- Keyword Hits: Keyword search hits show up here
- Hashset Hits: Hashset hits show up here
- E-Mail Messages: Email messages show up here
- Interesting Items: Things deemed interesting show up here
- Accounts: Credit card accounts show up here
- Tags: Any item you tag shows up here so you can find it again easily
Reports
Reports can be added by Ingest Modules or created using the Reporting tool.
Result Viewer
The Result Viewer windows are in the upper right area of the interface and display the results from selecting something in the tree. You will have the option to display the results in a variety of formats.
Right Click Functions
Viewers in Result Viewers have certain right-click functions built-in into them that can be accessed when a node a certain type is selected (a file, directory or a result). Here are some examples that you may see:
- Open File in External Viewer: Opens the selected file in an "external" application as defined by the local OS or through the External Viewer tab on the Options menu. For example, HTML files may be opened by IE or Firefox, depending on what the local system is configured to use.
- View in New Window: Opens the content in a new internal Content Viewer (instead of in the default location in the lower right).
- Extract: Make a local copy of the file or directory for further analysis.
- Search for files with the same MD5 Hash: Searches the entire file-system for any files with the same MD5 Hash as the one selected.
Thumbnail Result Viewers
Thumbnail Results Viewer displays the data catalog as a table of thumbnail images in adjustable sizes. This viewer only supports picture files (Currently, only supports JPG, GIF, and PNG formats). Click the Thumbnail tab to select this view. Note that for a large number of images in a directory selected in the Data Explorer, or for a View selected that contains a large number of images, it might take a while to populate this view for the first time before the images are cached.
Example
Below is an example of "Thumbnail Results Viewer" window:
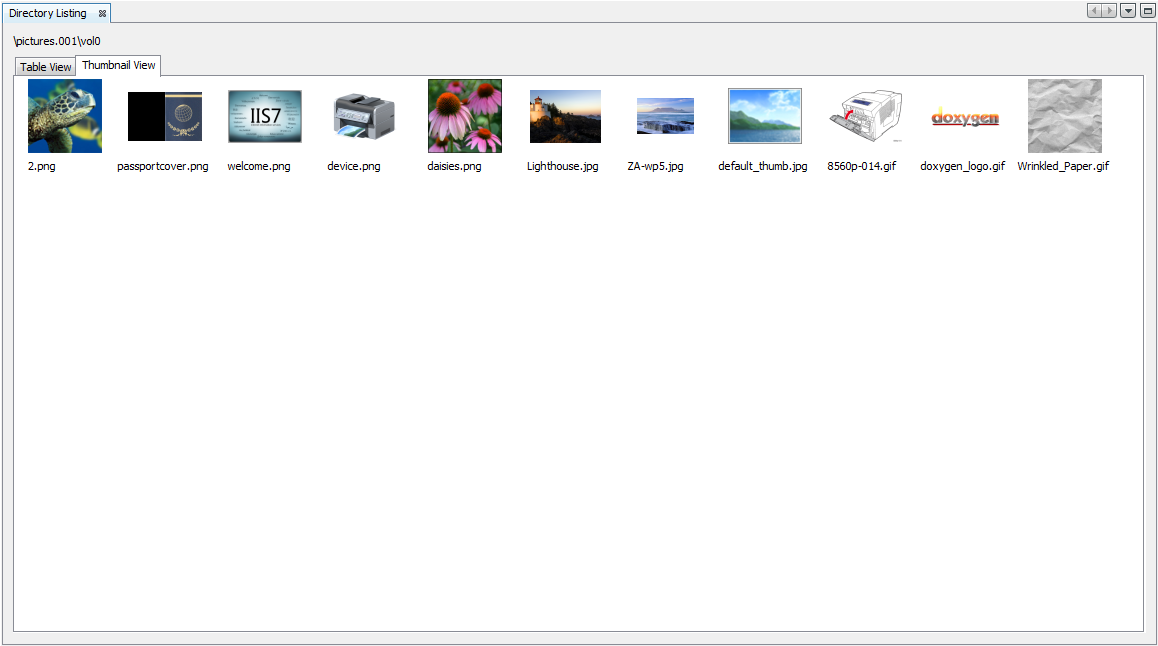
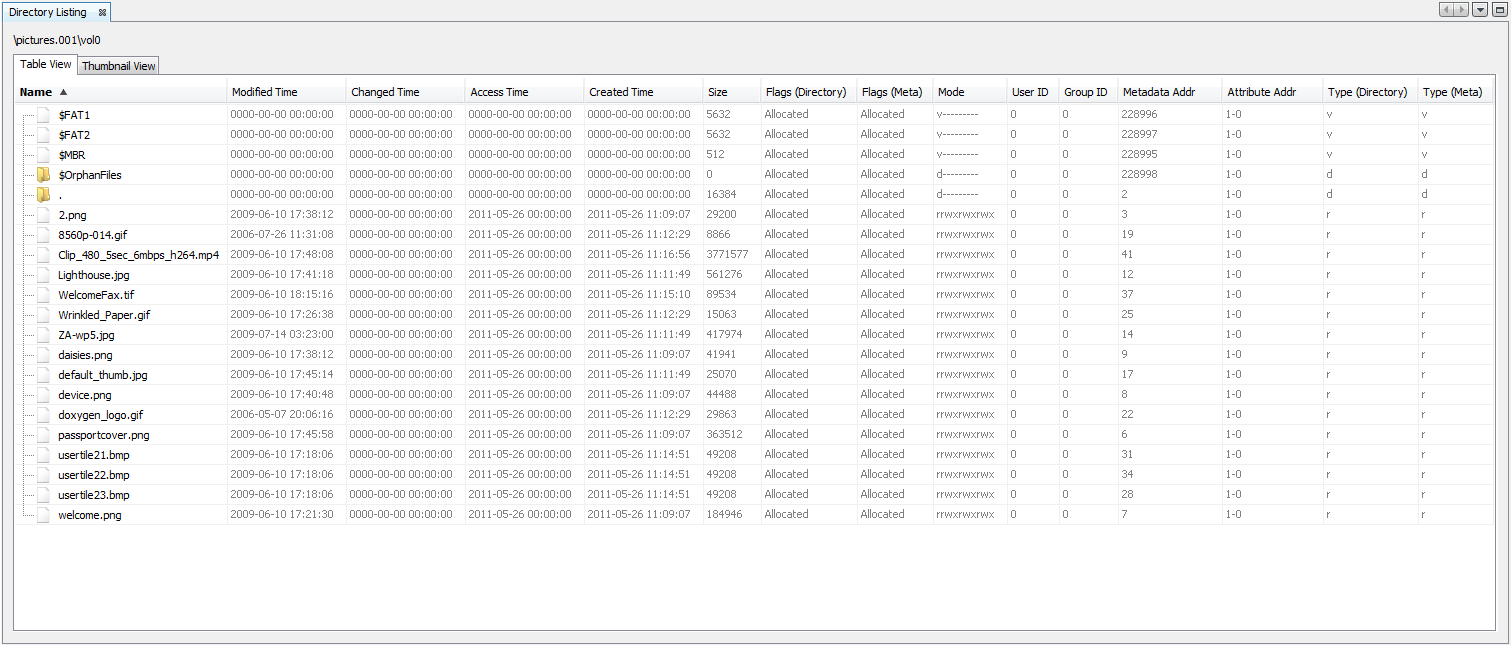
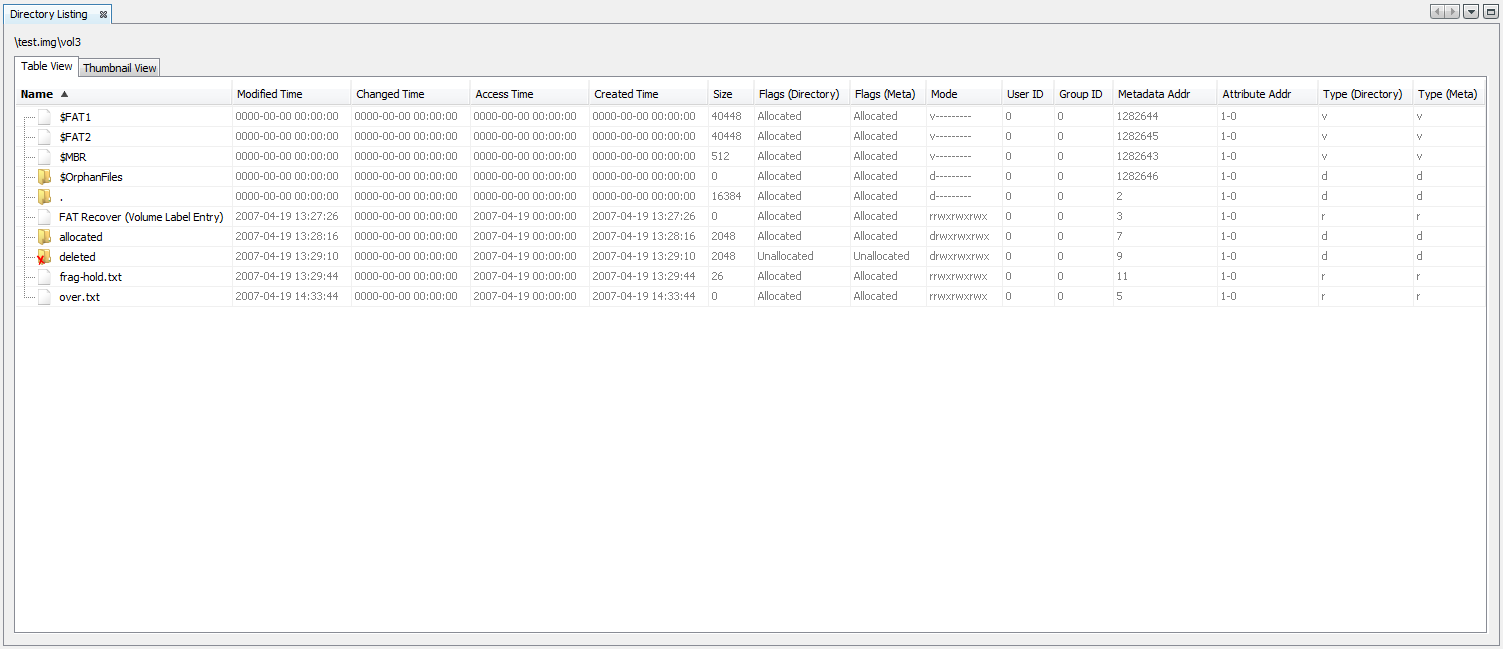
Table Result Viewers
Table Results Viewer (Directory Listing) displays the data catalog as a table with some details (properties) of each file. The properties that it shows are: name, time (modified, changed, accessed, and created), size, flags (directory and meta), mode, user ID, group ID, metadata address, attribute address, and type (directory and meta). Click the Table Viewer tab to select this view.
The Results Viewer can be also activated for saved results and it can show a high level results grouped, or a results at a file level, depending on which node on the Directory Tree is selected to populate the Table Results Viewer.
Example
Below is an example of a "Table Results Viewer" window:
Content Viewer
The Content Viewer area is in the lower right area of the interface. This area is used to view a specific file in a variety of formats. There are different tabs for different viewers. Not all tabs support all file types, so only some of them will be enabled. To display data in this area, a file must be selected from the Result Viewer window.
The Content Viewer area is part of a plug-in framework. You can install modules that will add more viewer types. This section describes the viewers that come by default with Autopsy.
Result Content Viewer
Content Viewer shows the artifacts (saved results) associated with the item selected in the Result Viewer.
Example Below is an example of "Result Content Viewer" window:
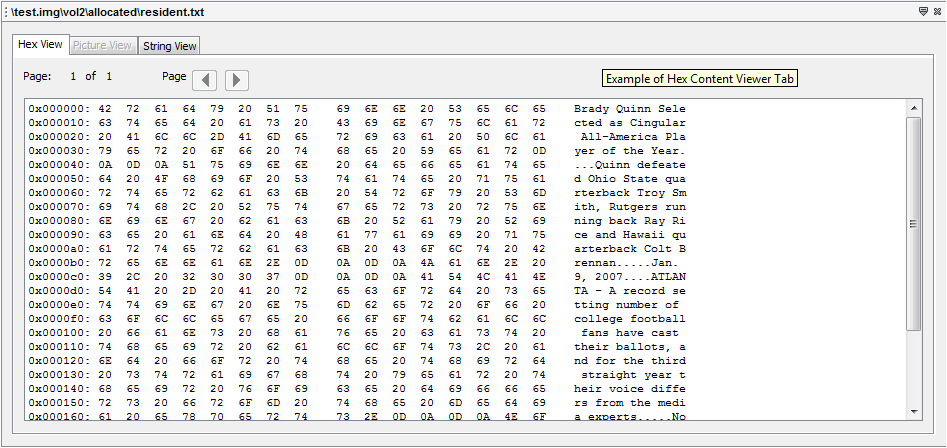
Hex Content Viewer
Hex Content Viewer shows you the raw and exact contents of a file. In this Hex Content Viewer, the data of the file is represented as hexadecimal values grouped in 2 groups of 8 bytes, followed by one group of 16 ASCII characters which are derived from each pair of hex values (each byte). Non-printable ASCII characters and characters that would take more than one character space are typically represented by a dot (".") in the following ASCII field.
Example
Below is an example of "Hex Content Viewer" window:
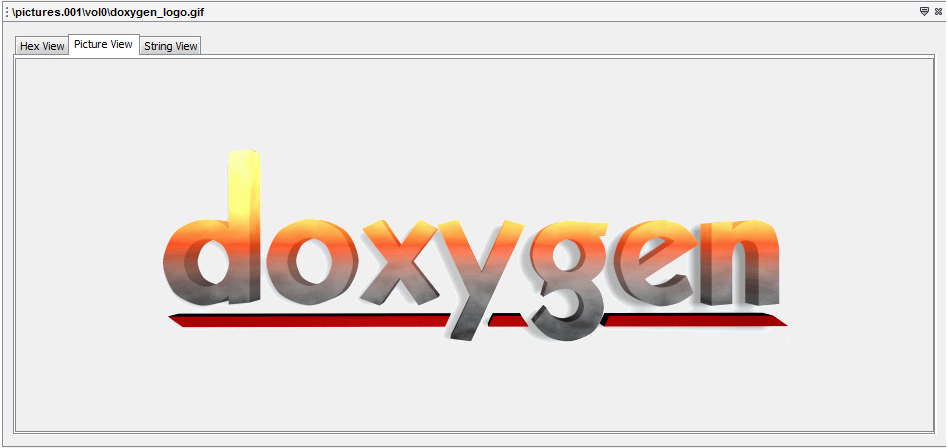
Media Content Viewer
The Media Content Viewer will show a picture or video file. Video files can be played and paused. The size of the picture or video will be reduced to fit into the screen. If you want more complex analysis of the media, then you must export the file.
If you select an non-picture file or an unsupported picture format on the "Result Viewers", this tab will be disabled.
Example
Here's one of the example of the "Media Content Viewer":
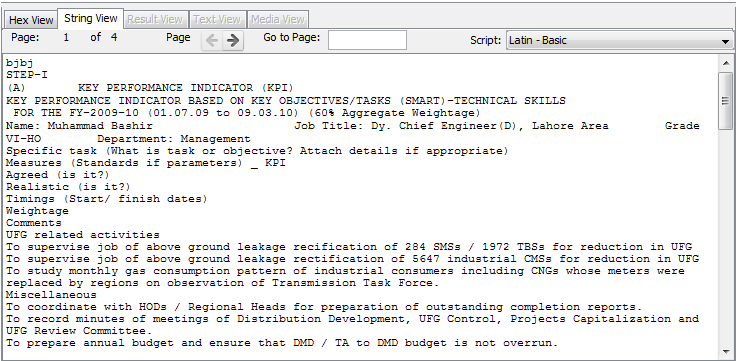
String Content Viewer
The String Content Viewer scans (potentially binary) data of the file / folder and searches it for data that could be text. When appropriate data is found, the String Content Viewer shows data strings extracted from binary, decoded, and interpreted as UTF8/16 for the selected script/language.
Note that this is different from the Text Content Viewer, which displays the text for a file that is stored in the keyword search index. The results may be the same or they could be different, depending how the data is interpreted by the indexer.
Example
Below is an example of "String Content Viewer" window:
Text Content Viewer
Text Content Viewer uses the keyword search index that may have been populated during Image Ingest. If a file has text stored in the index, then this tab will be enabled and it will be displayed to the user if a file or a result associated with a file is selected.
This tab may have more text on it than the "String View", which relies on searching the file for text-looking data. Some files, like PDF, will not have text-looking data at the byte-level, but the keyword indexing process knows how to interpret a PDF file and produce text. For the files the indexer knows about, there may be the METADATA section at the end of the displayed extracted text. If an indexed document contains any metadata (such as creation date, author, etc), it will be displayed there. Note that, unlike the "String View", the Text View does not have its built-in settings for the script/language to use for extracted strings. This is because the script/language is used at indexing time, and that setting is associated with the Keyword Search indexer, not the viewer.
If this tab is not enabled, then either the file has no text or you did not enable Keyword Search as an ingest module. Note that this viewer is also used to display highlighted keyword hits when operated in the "Search Matches" mode, selected on the right-hand side of the viewer's toolbar.

Keyword Search
Keyword Search allows the user to search for keywords in the data source. It is covered in more detail here: Keyword Search Module
Status Area
The Status area will show progress bars while ingest is occuring. This visually indicates to the user what portion of the processing is already complete. The user can click on the progress bars to see further detail or to cancel ingest jobs.